

Who says you need a sewing machine to look like a style pro?
You can remake tees, jeans, and accessories at home with scissors, glue, and a few beads.
Most projects take 20 to 90 minutes and cost about $5 to $30.
This post walks you through easy, wallet-friendly projects like tie-dye, patchwork denim, and quick embellishments.
They work for real life, small closets, busy nights, and thrift-store finds.
By the end you’ll have clear steps and quick wins you can finish in an afternoon or a spare evening.
Essential DIY Fashion Project Ideas to Get Started Quickly
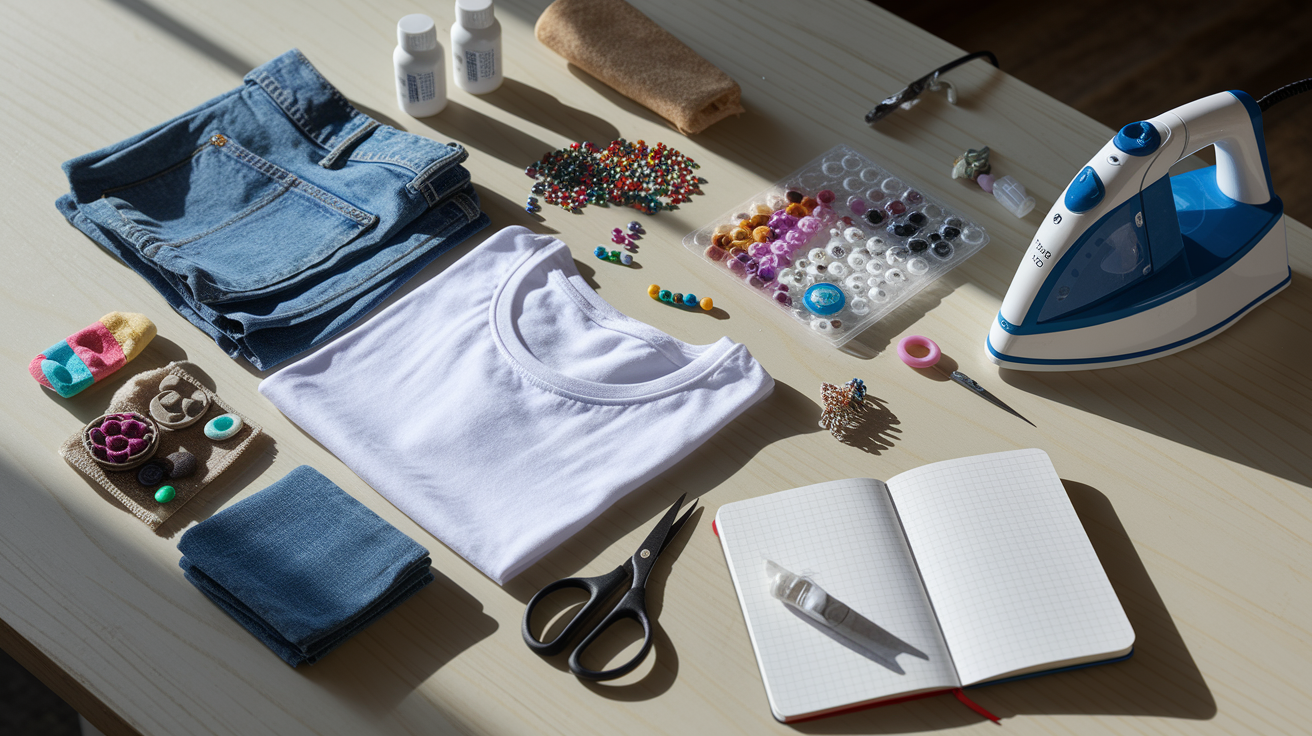
You don’t need fancy gear or years of practice to start making your own fashion pieces. Most beginner projects work with stuff you’ve already got—old T-shirts, jeans that don’t fit anymore, random fabric scraps, scissors, fabric glue, elastic. These projects slip into a weekend or even a random Tuesday night, and you end up with something finished without spending hours or emptying your wallet.
The projects here take 20 to 90 minutes, and materials usually cost $5 to $30. You’ll use things like iron-on patches (stick them with heat, no sewing), beads (string them or knot them onto fringe), fabric glue (bonds fabric without a needle), and clothes that are ready for a second life. If you’ve ever stared at a plain white tee thinking “I could do something with this,” these are the projects that make it happen.
Time and cost estimates keep these accessible even when you’re squeezing creativity around everything else or working with whatever’s in your budget. Tie-dye might take 30 minutes of actual work plus drying. A patchwork denim jacket could be an hour if you’re ironing patches on, or a whole afternoon if you’re hand-sewing each one. Either way, you’re making something that feels like it’s yours.
Six quick-start ideas to try first:
- Tie-dye tees: Rubber bands, gloves, and a dye kit on white cotton tees or sweatshirts
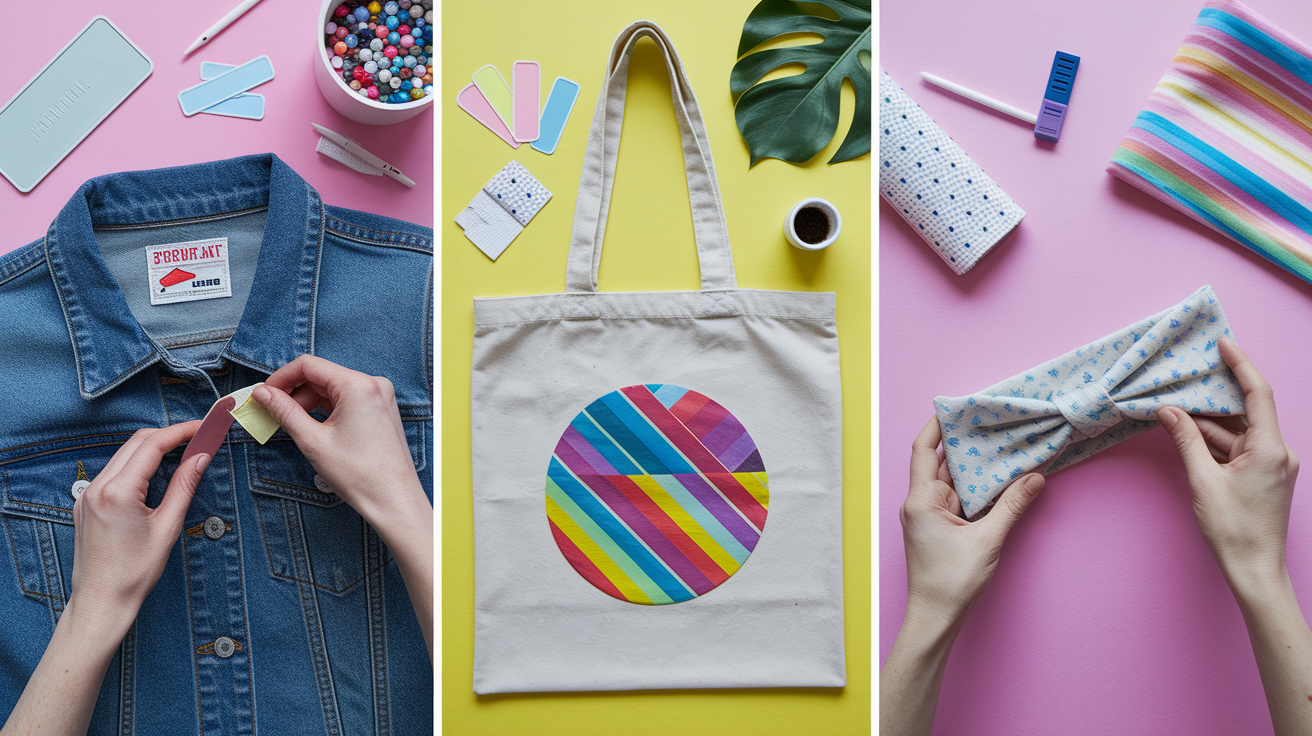
- Patchwork denim: Iron or sew patches onto jeans, jackets, or tote bags for instant character
- No-sew masks: Fold a bandana or old pillowcase, secure with hair elastics. Takes about 5 minutes
- Friendship bracelets and beaded jewelry: String beads onto thread or elastic, done in under 30 minutes
- Sandal upgrades: Wrap straps with bandanas, glue on pearls or rhinestones, add embroidered ribbon
- Fringe tees: Cut the hem into 1/2-inch strips, wet them so they curl, knot beads at the ends
Upcycling Clothing into New DIY Fashion Projects
Upcycling turns clothes you’ve stopped wearing into pieces you actually will. It’s free if you’re using stuff already sitting in your closet, and it keeps worn sweaters, faded tees, stretched dresses, and too-long jeans out of the trash. The best candidates are clothes with good fabric but outdated cuts, stains in one spot, or fits that don’t work anymore. A pillowcase becomes mask fabric. An old dress becomes a scrunchie. Jeans that don’t fit become shorts that do.
Most upcycling needs scissors, fabric glue, and maybe elastic or a few patches. You’re not starting from scratch. You’re editing what’s already there. That makes it faster and way less intimidating than sewing something new.
Five thrift-flip transformations you can finish in an afternoon:
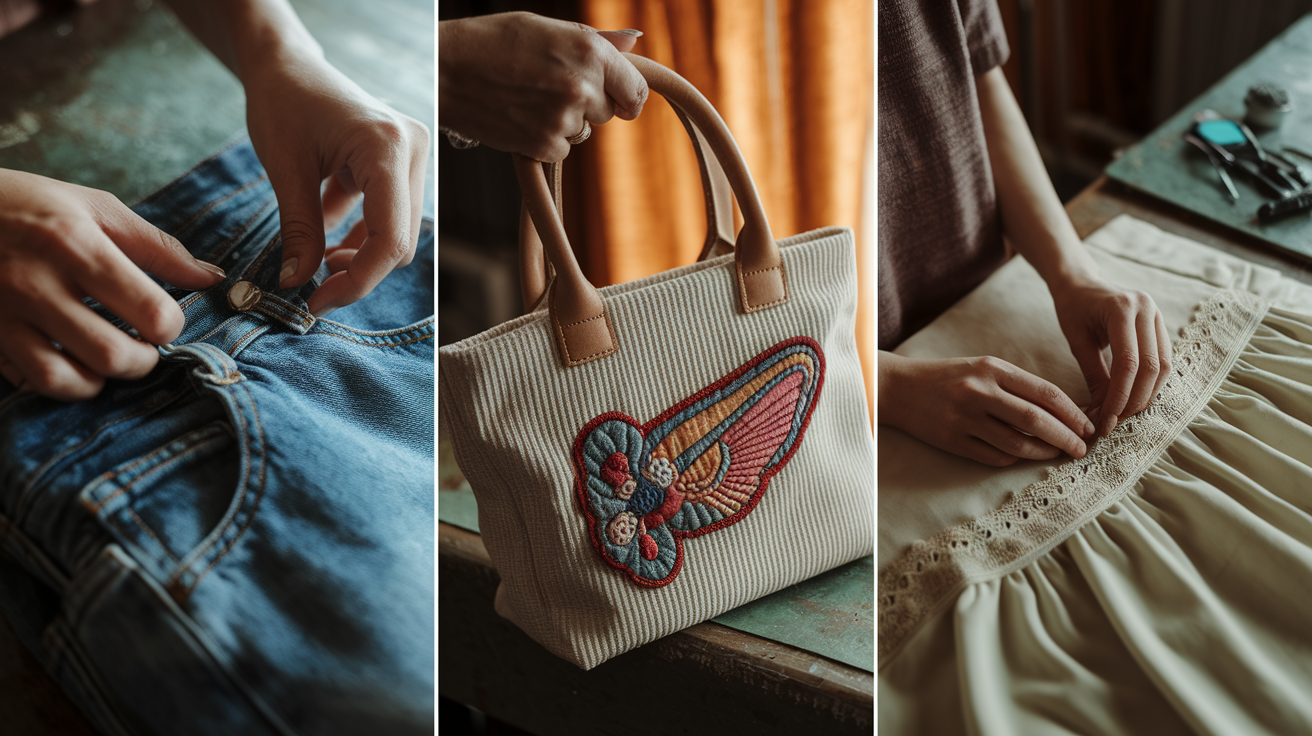
- Turn jeans into shorts: Cut straight across where you want them, then fray the hem by pulling threads or leave it clean.
- Patch a tote bag: Iron on a vintage patch, embroider a monogram, or glue fabric scraps for a mural effect.
- Embellish a dress: Add lace trim to the hem, sew beads along the neckline, attach ribbon at the waist.
- Kids’ clothing refreshes: Use iron-on letters to label hand-me-downs, patch knee holes with fun shapes, dye stained shirts a new color.
- Cut tees into tanks: Remove sleeves and widen the neck, then hem or leave raw edges for a lived-in look.
T-Shirt and Denim Transformations for Trendy DIY Fashion Projects
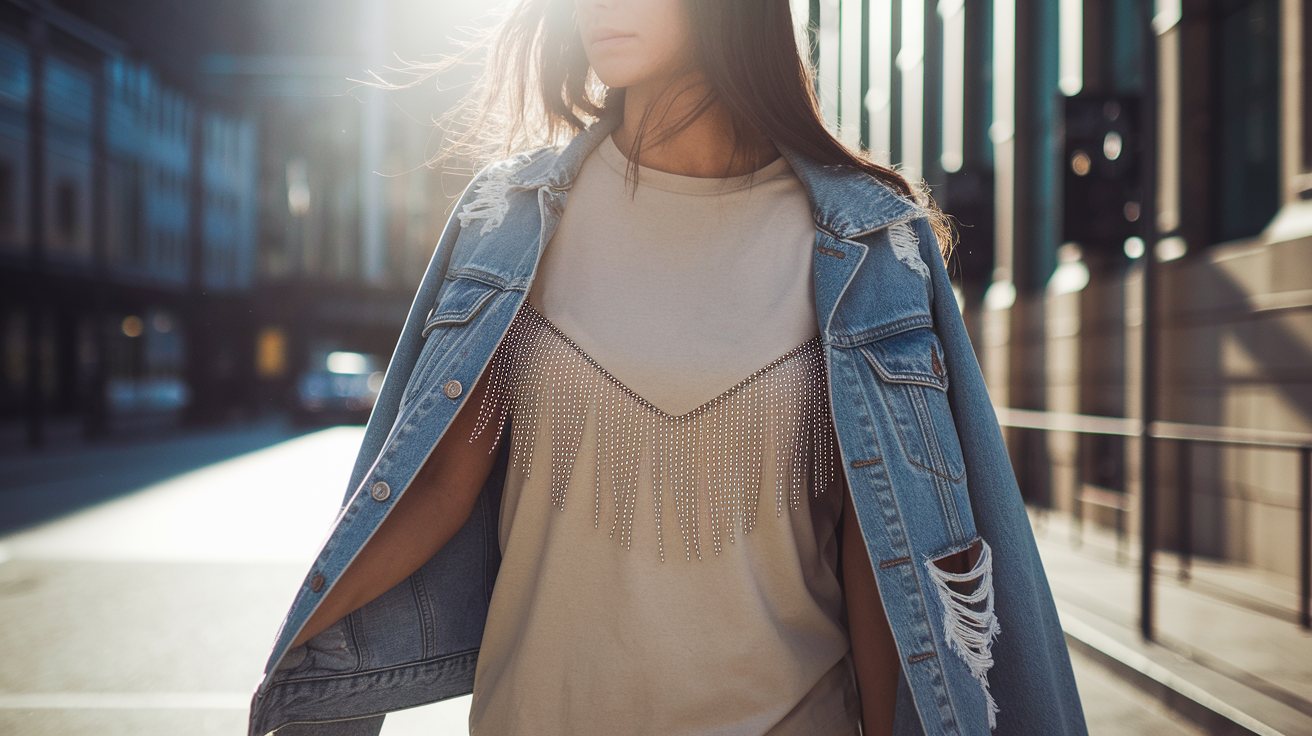
T-shirts and denim are the easiest to transform because the fabric forgives mistakes, and errors usually look intentional anyway. White cotton tees take dye really well, old band shirts can be cropped without losing the graphic, and jeans can be distressed, patched, or cut without falling apart. These projects let you practice techniques without worrying about ruining something expensive.
Cutting a tee into fringe strips about 1/2 inch wide gives you a boho hem that curls when wet. Knotting beads at the ends keeps the fringe from unraveling and adds weight so the strips hang nicely. Iron-on patches stick to denim jackets and jeans with just heat and pressure. No sewing required. If you do want to sew, denim holds stitches well, so even wobbly beginner seams look sturdy. Distressing jeans means using sandpaper, a cheese grater, or scissors to fray edges and create worn spots. It’s one of the few projects where being rough improves the result.
Denim also hides alterations really well. If you trim jeans into shorts and the hem looks uneven, that reads as casual, not sloppy. If you patch a hole and the fabric puckers a little, it adds texture.
| Project | Materials Needed | Estimated Time |
|---|---|---|
| Crop top conversion | Old tee, fabric scissors, ruler or tape measure | 10–15 minutes |
| Distressed denim | Jeans, sandpaper or cheese grater, scissors, tweezers (for pulling threads) | 30–60 minutes |
| Patch denim jacket | Denim jacket, iron-on or sew-on patches, iron or needle and thread | 20–90 minutes depending on number of patches |
| Fringe tee with beads | Old tee, scissors, beads, bowl of water | 30–45 minutes plus drying time |
Creative Dyeing DIY Fashion Projects: Tie-Dye, Ombre, Dip-Dye & More
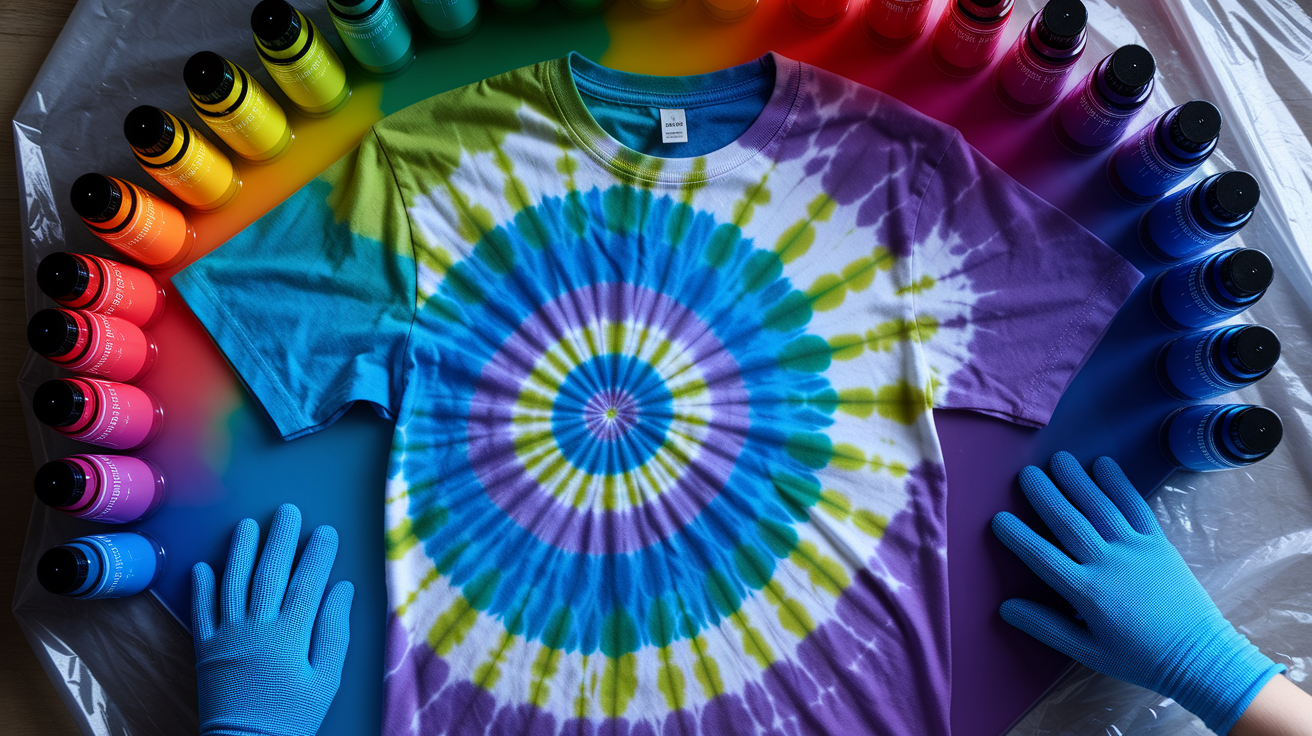
Dyeing fabric is messy, so plan to work outside or somewhere drips won’t matter. Wear gloves. Dye stains skin and takes days to fade. Rubber bands, string, or clips create patterns by controlling where dye reaches the fabric. White cotton tees, sweatpants, bike shorts, and canvas tote bags all dye well. Synthetic fabrics like polyester or nylon don’t hold dye the same way, so check the label before you start.
Basic tie-dye kits include dye powder, squeeze bottles, gloves, and rubber bands. Natural dye kits use plant-based colors (turmeric yellow, avocado pink, indigo blue) and take longer to set but give softer, earthier tones. Once you’ve dyed a piece, it needs to sit, sometimes overnight, then be rinsed until the water runs clear. Drying adds a few hours, so factor that in if you’re hoping to wear your new tee the same day.
Seven dye patterns to try, easiest to more involved:
- Spiral: Pinch the center of the fabric, twist into a flat spiral, band it like a pizza, apply dye to each wedge.
- Crumple: Scrunch fabric randomly, band it loosely, squirt dye all over for an abstract watercolor effect.
- Stripe: Fold fabric accordion-style, band every few inches, dye alternating sections.
- Ombre: Dip the bottom half of a tee or dress into dye, lift it out gradually to create a fade from dark to light.
- Dip-dye: Submerge just the hem, cuffs, or sleeves in dye for a clean color-block look.
- Shibori fold: Fold fabric into squares or triangles, clamp with wooden blocks or clothespins, then dye. Unfold to reveal geometric patterns.
- Bleach art: Use a bleach pen or spray bottle to remove color from dark fabric, creating reverse tie-dye designs. Work outside, don’t breathe the fumes.
Embellishment Techniques for DIY Fashion Projects
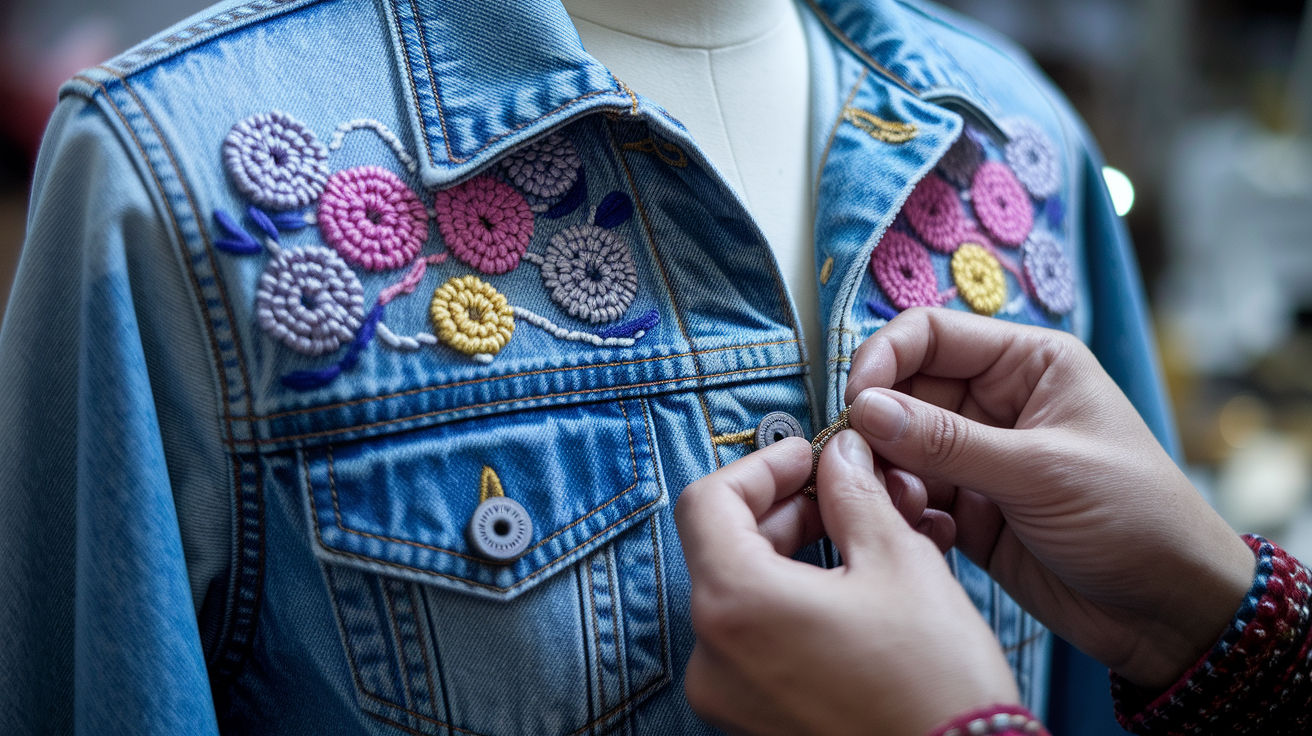
Embellishments add personality to plain clothes without changing the cut or fit. A basic tee becomes special with a line of embroidery along the pocket. A denim jacket gets a story when you add patches from places you’ve been. Embellishing also covers stains, worn spots, or small holes. Turn a problem into a design detail.
Common embellishment supplies include alphabet embroidery kits (thread, patterns, needles, and a hoop), iron-on patches (roses, bees, letters, vintage logos), flatback rhinestones or pearls (glue directly onto fabric), and trims like lace, eyelet ribbon, or embroidered flowers. Fabric glue works for most lightweight embellishments and dries clear in a few hours. If you’re adding heavier items like metal studs or large beads, hand-sewing makes sure they stay put through washing and wearing.
Types of Embellishment Techniques
- Embroidery: Use needle and thread to stitch patterns, letters, or simple shapes directly onto fabric. Alphabet kits guide beginners through letter formation.
- Appliqué: Attach fabric shapes (cut from another garment or bought pre-cut) by sewing or ironing them onto a base garment. Great for covering holes or adding bold graphics.
- Beading: String beads onto thread, then sew them in lines, clusters, or scattered patterns across hems, collars, or pockets.
- Sequins: Sew sequins individually or buy sequin trim and glue or stitch it along seams, necklines, or cuffs for shimmer.
- Trim-based accents: Glue or sew lace, pom-pom trim, eyelet ribbon, or embroidered tape along hems, sleeves, or waistbands to refresh the garment’s silhouette.
Accessories as DIY Fashion Projects: Jewelry, Headwear & Footwear
Accessories are smaller, faster projects that let you practice techniques before committing to full garments. A beaded bracelet takes 15 minutes. Painted sneakers take an afternoon. Both give you something new to wear and build skills you’ll use on bigger projects later.
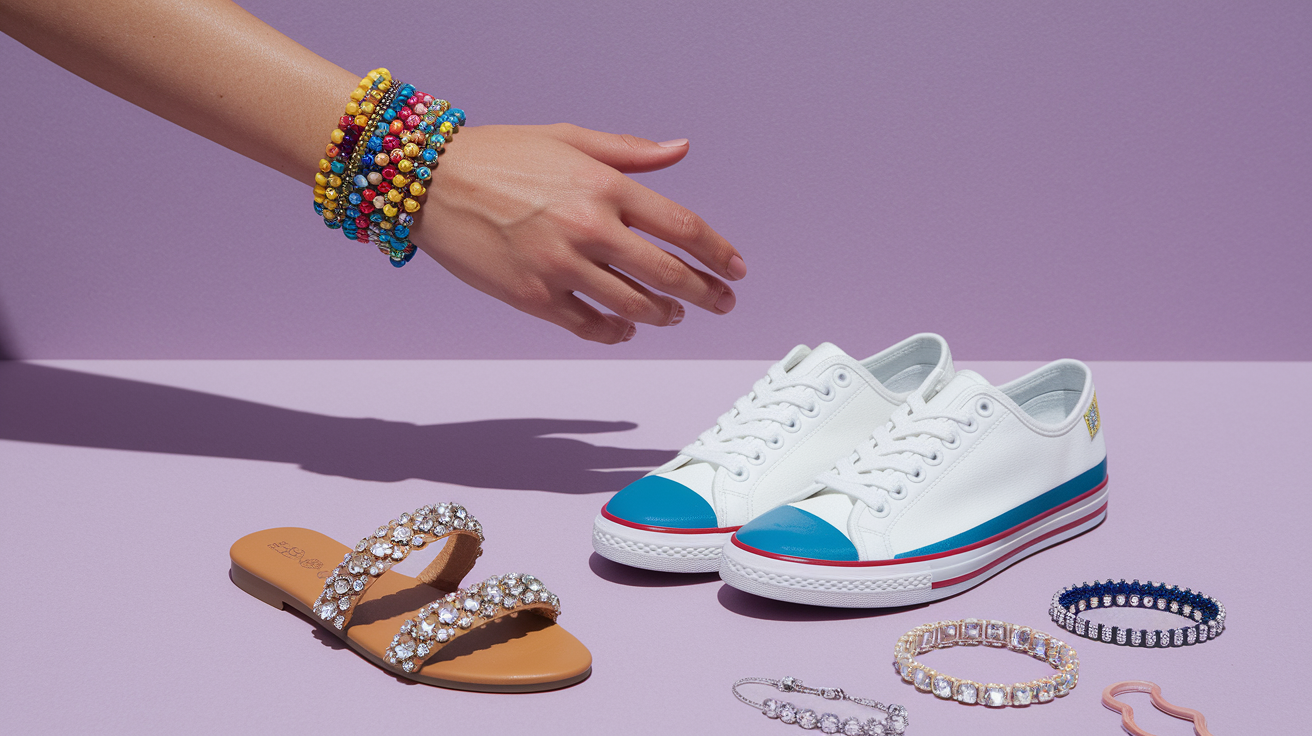
Jewelry projects use beads (glass, ceramic, pony beads, pearls), jewelry thread or elastic cord, and basic findings like jump rings and clasps. Opening and closing jump rings with pliers and forming wire loops are foundational skills that carry over into beading garments. Painted sneakers start with plain white canvas shoes and acrylic paint or fabric markers. You can letter a favorite quote, paint simple shapes, or try a tie-dye effect with diluted dye and a spray bottle.
Sandal embellishment breathes new life into worn summer shoes. Wrap fabric (bandanas work well) around straps and secure with fabric glue. Glue flatback pearls or rhinestones along the strap edges for a dressier look. Sew or glue embroidered ribbon trim or cotton eyelet lace over the existing straps. Each option takes about 30 minutes and transforms a $10 pair of sandals into something that looks intentional and custom.
Six accessory projects to try:
- Macramé earrings: Knot embroidery thread or thin cord into simple patterns, add beads, attach to earring hooks.
- Beaded bracelets: String pony beads or glass beads onto elastic cord, tie off, and trim. Friendship bracelet energy, faster results.
- Sneaker painting: Sketch your design lightly in pencil, fill in with fabric paint, seal with clear acrylic spray once dry.
- Sandal trims: Glue lace, embroidered flowers, or wrapped bandanas onto straps. Add pearls or rhinestones as accents.
- Repurposed belts: Cut old leather belts, punch new holes, add studs or paint, or braid fabric strips through belt loops for a boho look.
- Hair accessories: Sew scrunchies from old dresses or scarves (one fabric rectangle plus elastic), make knotted headbands, or glue beads onto plain hair clips.
Beginner-Friendly Sewing DIY Fashion Projects
Sewing opens up more complex projects, but you don’t need to master advanced techniques to make useful, wearable items. A straight stitch and basic understanding of how fabric behaves will get you through most beginner projects. Start with something small and functional. A simple mask, a hemmed tee, an elastic waistband replacement. You’re building skills while making something you’ll actually use.
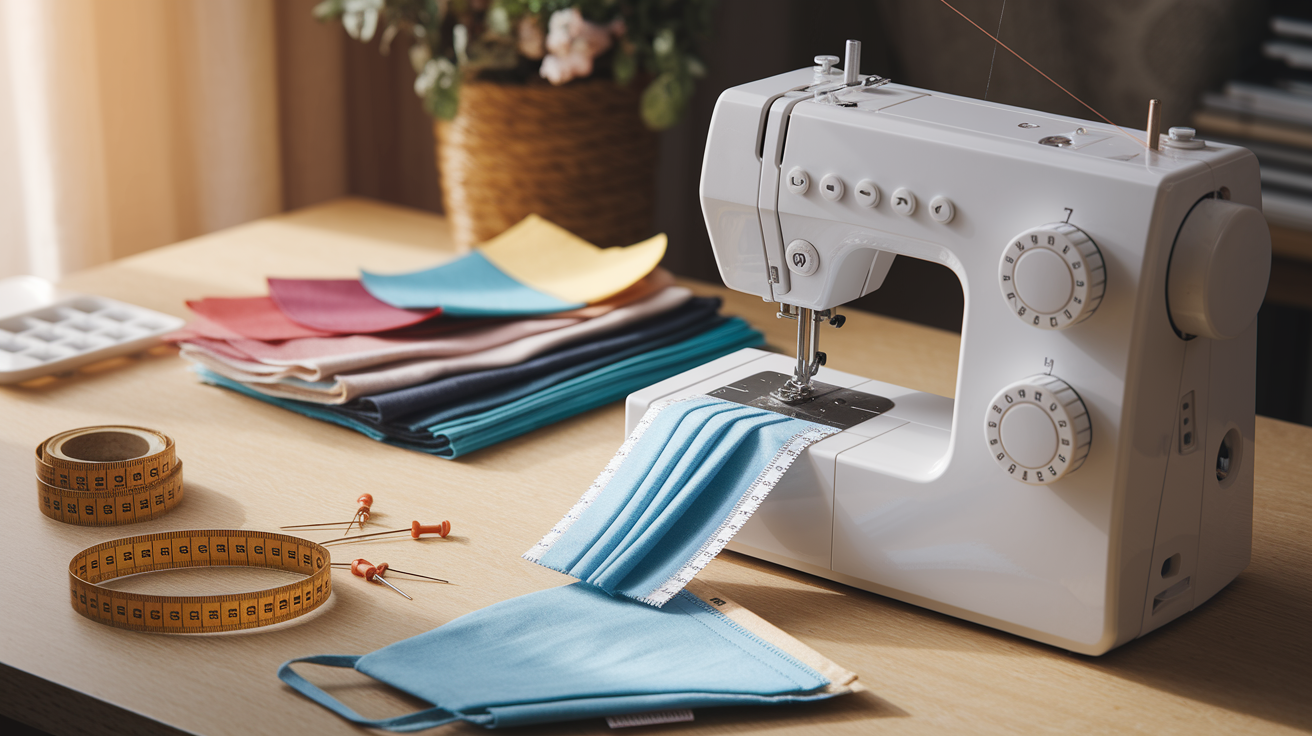
Basic sewing kits include needles, thread, a seam ripper (for fixing mistakes), pins, and fabric scissors. A beginner sewing machine speeds things up, but hand-sewing works fine for small projects and repairs. If you’re hemming pants, you can do it by hand in about 30 minutes. If you’re resizing a dress, a machine makes the seams faster and stronger, but the steps are the same: measure, pin, sew, trim excess.
Elastic waistbands are particularly beginner-friendly because the elastic hides uneven stitches and the waistband stretches to fit. Replacing a worn-out elastic band in sweatpants or a skirt teaches you how to thread elastic through a casing, which is a skill you’ll use again. Masks, both folded no-sew versions and simple sewn versions, were a gateway sewing project for a lot of people. The 5-step sewn mask guide (cut fabric rectangles, sew sides, create casing, thread elastic, finish edges) is a solid introduction to following a sewing pattern.
A simple sewing progression to build confidence step by step:
- Hemming: Fold fabric twice to hide raw edges, pin, and sew a straight line. Practice on old tea towels or tee hems before moving to pants.
- Elastic waistband: Measure your waist, cut elastic to fit snugly, sew the ends together, then attach to a fabric tube or thread through an existing casing.
- Resizing garments: Take in side seams on a too-big shirt by pinning along your body, sewing a new seam inside the old one, and trimming excess fabric.
- Beginner mask: Cut two fabric rectangles, sew the long sides, fold and sew casings at top and bottom, thread elastic or ties through, and secure the ends.
No-Sew DIY Fashion Projects for Quick Wins
No-sew projects use fabric glue, iron-on adhesive, folding, knotting, or clips instead of stitching. They’re faster, require fewer tools, and let you try ideas without committing to permanent seams. If you’re testing a style or working with kids, no-sew is the way to start. These projects also work well in rentals or dorm rooms where you might not have space for a sewing machine.
Fabric fusion adhesives and all-purpose fabric glue bond fabric when you press the pieces together and let them dry. They hold through washing if you follow the label instructions (usually a 24-hour cure time and avoiding heat until fully set). Painters tape acts as a guide for straight lines when gluing trims or cutting fabric. Hair elastics and rubber bands secure fabric folds for masks, headbands, and quick accessories. An old T-shirt or pillowcase becomes a no-sew mask by folding it into thirds, securing the ends with elastics, and tucking the sides in.
Five quick no-sew hacks you can finish in under 20 minutes each:
- No-sew mask: Fold a bandana or fabric square into thirds lengthwise, loop hair elastics over each end, fold the sides into the center, and tuck one side into the other to hold.
- Glue-on patches: Position iron-on patches where you want them, press with a hot iron for 30 seconds, let cool, and check the bond. No needle required.
- Folded headbands: Cut a wide strip from an old T-shirt, twist it once, and tie or glue the ends together for a stretchy headband.
- Glued trims: Run a thin line of fabric glue along the edge of lace or ribbon, press onto a hem or seam, and clamp with clothespins or clips until dry.
- No-sew tote bag: Fold a large T-shirt in half, glue the side seams, cut off the sleeves to form handles, and reinforce the bottom with a second layer of glue or iron-on hem tape.
Materials, Tools, and Safety for DIY Fashion Projects
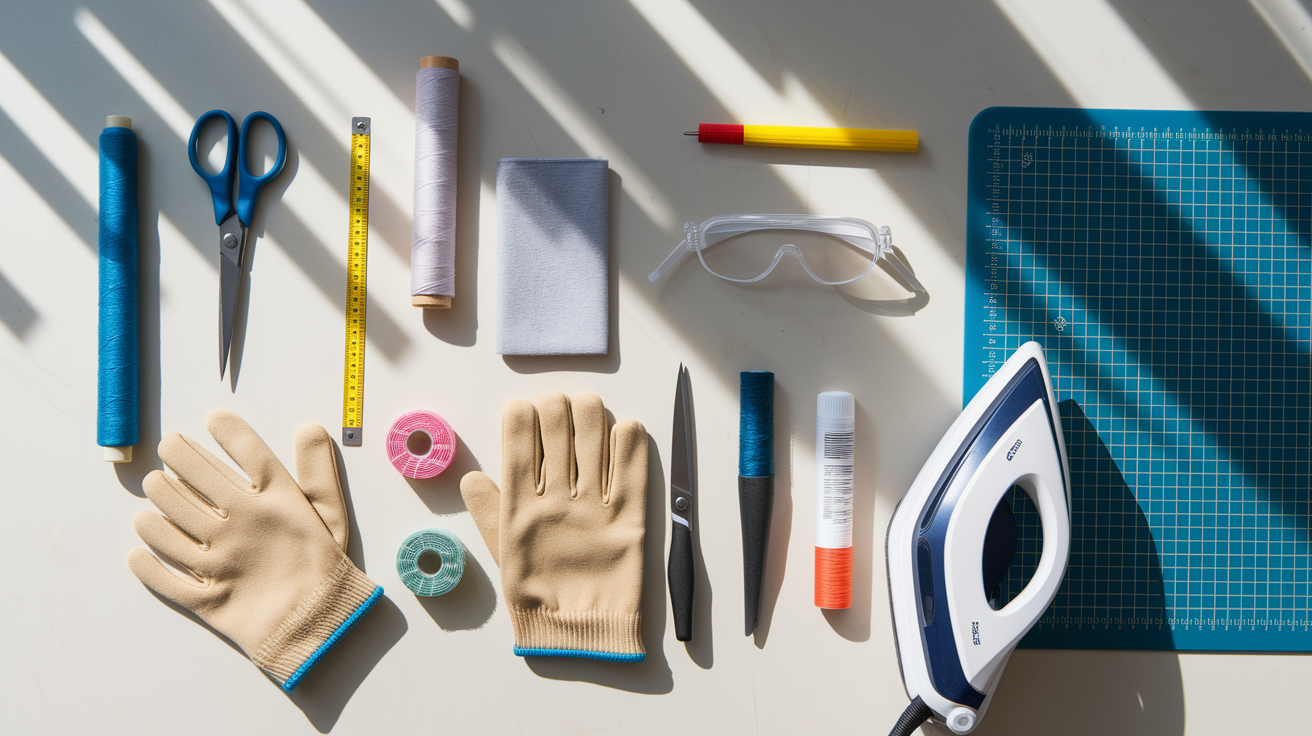
Most beginner DIY fashion projects use a short list of core tools: fabric scissors (sharper and stronger than regular scissors, making clean cuts through multiple fabric layers), a basic sewing kit (needles, thread, pins, seam ripper, measuring tape), fabric glue or iron-on adhesive tape, an iron, and a workspace you can get messy. As you add techniques, you’ll pick up specialty items. Beads and jewelry findings for accessories, dye kits and rubber bands for color projects, a beginner sewing machine if hand-sewing feels too slow.
Shopping for materials works best when you start with one project and buy exactly what it needs, rather than stocking a full craft room up front. A single tie-dye kit costs $10 to $20 and includes everything for several tees. An embroidery kit with thread, hoop, needles, and patterns runs $15 to $25. Fabric glue, patches, trims, and beads are available at craft stores and online, often in small quantities so you’re not stuck with leftovers. Painters tape, rubber bands, and hair elastics are household basics that double as DIY tools.
Safety matters, especially when you’re using heat, sharp tools, chemicals, or small parts. A little planning keeps projects fun instead of stressful.
Four safety rules to follow as you work:
- Dyes and chemicals: Wear gloves to protect your skin. Work outside or in a well-ventilated space. Cover surfaces with plastic sheeting or old towels. Rinse dyed fabric thoroughly before the first wash to prevent color transfer.
- Heat tools (irons, heat guns, and ovens): Always use a pressing cloth or parchment paper between the iron and patches or delicate trims. Keep the iron on a stable surface. Never leave heat tools unattended. Let everything cool completely before handling.
- Adhesives and glues: Read labels for cure times and washing instructions. Work in a ventilated area if the glue has strong fumes. Keep glue away from kids and pets. Test glue on a scrap piece before applying to your project.
- Cutting tools and needles: Use fabric scissors only on fabric (cutting paper dulls the blades). Store scissors and needles in a closed container when not in use. Cut away from your body. Keep a small first-aid kit nearby for accidental pokes or nicks.
Final Words
Start with one quick win—tie‑dye a tee, add a patch to denim, or try a no‑sew mask—and build momentum from there.
This post walked through easy categories: upcycling and thrift flips, tee and denim refashions, dye techniques, embellishments, accessories, beginner sewing steps, no‑sew hacks, plus the basic tools and safety pointers you’ll actually use.
Pick one project that fits your time and budget. These diy fashion projects are doable, fun, and make your closet feel fresher—seriously worth a weekend.
FAQ
Q: What are beginner-friendly DIY fashion projects?
A: Beginner-friendly DIY fashion projects are tie-dye tees, no-sew masks, simple jewelry, patchwork denim, sandal trims, and fringe tees—low skill, common materials, and clear step lists make them approachable.
Q: What materials and tools do I need to start DIY fashion projects?
A: Materials and tools you need include fabric scissors, fabric glue, iron-on patches, a basic sewing kit or machine, beads, paints or dyes, rubber bands, and gloves for dyeing.
Q: How much time and money do DIY fashion projects usually take?
A: DIY fashion projects usually take 20–90 minutes and cost $5–$30, with simple tweaks done in an hour and more detailed refashions taking a weekend.
Q: What are simple upcycling ideas for old clothes?
A: Simple upcycling ideas for old clothes include turning jeans into shorts, making tote bags from tees, embellishing dresses, patching with scraps, and resizing kids’ shirts with elastic.
Q: How do I convert a T-shirt or denim into a trendy piece?
A: To convert a T-shirt or denim into a trendy piece, cut and knot for crop tops or fringe, add iron-on patches, distress edges, or sew on beads and trims for texture.
Q: What dyeing projects are beginner-friendly and what should I watch for?
A: Beginner-friendly dyeing projects include spiral tie-dye, ombre dip-dye, and crumple patterns; watch for messy setups, use gloves, work outside, and allow full drying time.
Q: What no-sew projects give quick wins?
A: Quick no-sew wins are glue-on patches, folded headbands from old tees, no-sew masks, glued trims on sandals, and no-sew tote bags made by knotting.
Q: What embellishment techniques work best for beginners?
A: Embellishment techniques that work best for beginners are iron-on appliqué, simple hand embroidery, glued flatback gems, basic beading on trims, and adding fringe or ribbon accents.
Q: What sewing projects should a beginner learn first?
A: Beginner sewing projects to learn first are hemming, adding elastic waistbands, simple resizing, and making a basic mask—each teaches practical skills used in many refashions.
Q: How do I keep DIY clothes durable and easy to care for?
A: To keep DIY clothes durable, use fabric-appropriate glue or stitches, finish raw edges, wash cold inside-out, and reattach loose beads or patches promptly to extend wear.
Q: Are these DIY fashion projects kid-friendly?
A: Many projects are kid-friendly—tie-dye, simple beading, and basic upcycles—just supervise cutting, hot tools, and dyeing, and pick washable materials for active kids.
Q: Where can I find step-by-step photo tutorials for these projects?
A: Step-by-step photo tutorials are usually on craft blogs, how-to websites, and video channels; look for clear photos per step, material lists, time estimates, and beginner labels.