

Think you need sewing skills to make a denim jacket look cool?
You don’t.
Denim is tough, cheap at thrift stores, and forgiving of mistakes, so it’s perfect for practicing.
With basic supplies and an hour or less you can try iron-on patches, simple embroidery, hand painting, bleach effects, fringe, or beaded accents.
This post gives six easy starter projects, step-by-step tips, and low-cost tricks so beginners can confidently transform a jacket into a personal statement without stress.
Beginner-Friendly Denim Jacket Upcycling Techniques That Anyone Can Start Today

Denim jackets are probably the easiest thing to upcycle if you’re just getting started. The fabric’s tough. It can handle mistakes. You can paint it, cut it, bleach it, sew on it without worrying you’ll wreck the whole thing. And if something goes sideways, just slap a patch over it or layer on another design element.
Thrift stores are loaded with denim jackets, and they’re cheap. Really cheap. In July, when stores are clearing out heavier stuff, you can sometimes snag one for a dollar. That low barrier makes it easy to experiment. Practice on a $1 jacket before you touch anything pricier, or customize a bunch as gifts without spending much.
Most beginner techniques need only basic supplies and take less than an hour. You don’t need advanced sewing skills or fancy tools. A lot of methods don’t even involve sewing, which means anyone can jump in and start personalizing a jacket the same day they find one.
Here are six simple starter ideas:
- Iron-on or adhesive patches for quick personalization
- Easy floral embroidery on pockets or sleeves
- Hand-painted designs or quotes using fabric paint
- Bleach dip-dye or spray patterns for color contrast
- Fringe trim along hems or pockets for texture
- Beading or sequin accents on collars or cuffs
| Technique | Skill Level | Time Estimate |
|---|---|---|
| Patches (iron-on or adhesive) | Beginner | 15–30 minutes |
| Embroidery accents | Beginner | 30–90 minutes |
| Hand painting | Beginner | 30–60 minutes plus drying |
| Bleaching (dip or spray) | Beginner | 10–30 minutes plus rinse |
The beauty here is you can start small. A jacket that begins with one patch can turn into a fully customized piece over time, and each step teaches you something new without a big time or money commitment upfront.
Essential Supplies for Denim Jacket Upcycling Projects
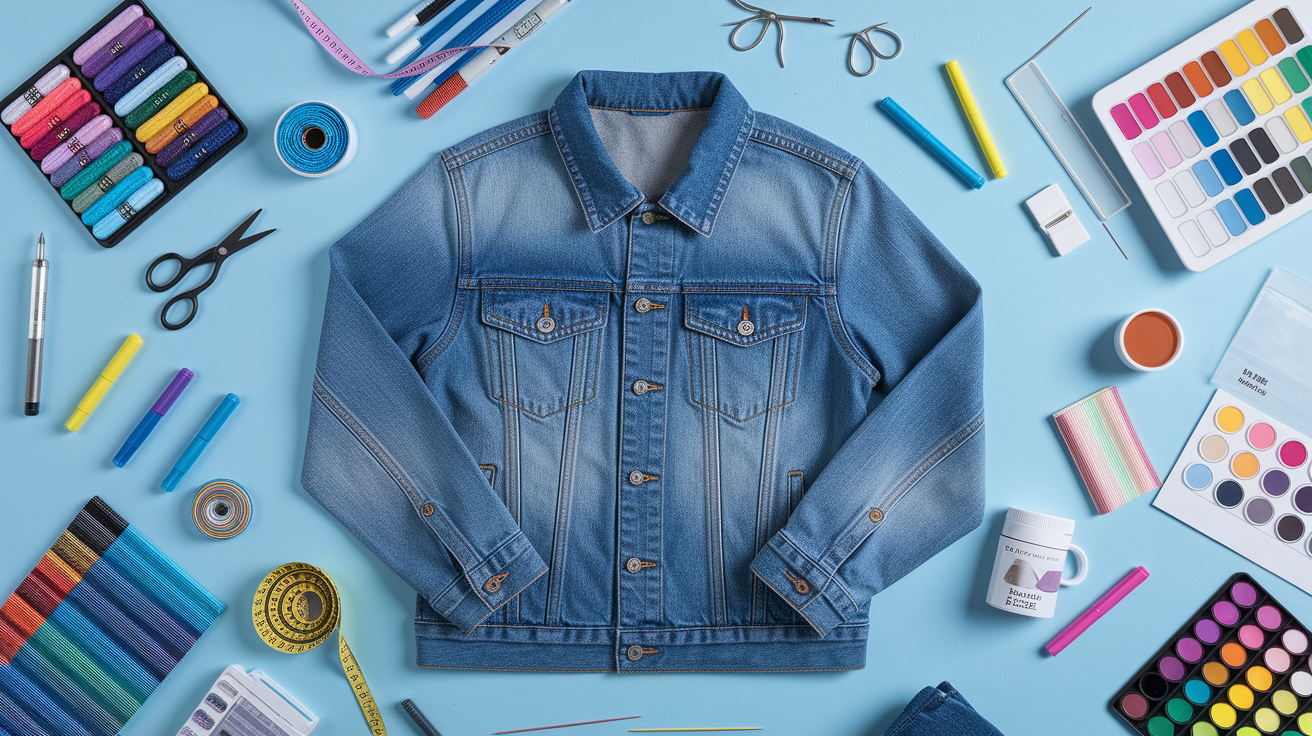
Before you start, gather a few basic supplies. You don’t need much. Most of these are things you might already have or can pick up cheap at a craft store or thrift shop. Having everything ready before you begin makes the whole thing smoother and keeps you from getting frustrated halfway through.
Prewashing your jacket is important. Denim often has sizing or leftover dye that messes with paint, bleach, or adhesive patches. A quick wash and dry clears that off and gives you a cleaner surface. It also preshrinks the fabric so your finished design won’t warp or pucker later.
Here’s what you’ll need:
- Denim jacket (thrift store find or an old one from your closet)
- Embroidery floss in a few colors
- Hand sewing needles and basic thread
- Fabric scissors (sharper than paper scissors)
- Measuring tape or ruler
- Chalk markers or fabric pens for sketching designs
- Straight pins for holding pieces in place
- Iron-on patches or DTF transfers (optional for no-sew projects)
- Fabric paint or acrylic paint mixed with fabric medium
- Old towels or cardboard to place inside the jacket while working
If you’re doing patchwork or embroidery, keep scrap fabric on hand. Cutting 2.5″ strips from old fabrics works well for piecing together colorful panels. Keep your supplies organized in a small box or bag so everything stays together between sessions.
No‑Sew Denim Jacket Upcycling Ideas for Total Beginners
If you don’t know how to sew or just don’t feel like dealing with needles and thread, no-sew options are perfect. They’re fast, forgiving, and great for anyone who wants quick results. Also ideal for kids or group crafting where not everyone has sewing experience.
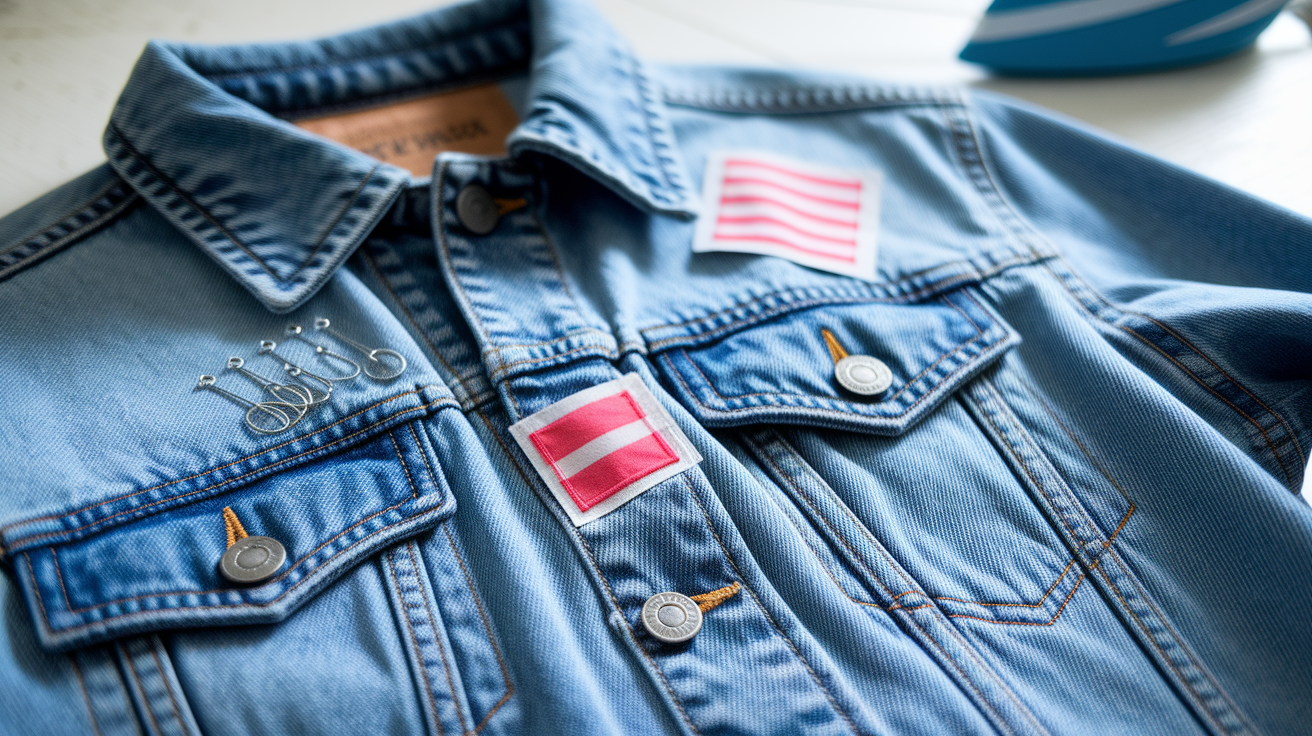
Iron-On or Adhesive Patches
Patches are one of the easiest ways to personalize a denim jacket. You can buy iron-on patches at craft stores, online, or thrift shops. They come in every style you can think of: band logos, flowers, funny sayings, animals, flags. To apply them, place the patch where you want it, cover it with a thin towel, and press with a hot iron for about 30 seconds. No stitching required.
The trick to making patches last is securing the edges. Some people skip this and end up with peeling corners after a few washes. If you want the patch to stay put, add a tiny line of fabric glue around the edge or use a few hand stitches in matching thread to tack down the corners. Takes an extra five minutes but makes a big difference.
Ready-to-Press DTF Transfers
DTF transfers (Direct-to-Film) are printed designs you press onto fabric with heat. They’re different from regular iron-on transfers because they print all colors, including white, so the design shows up clearly even on dark denim. You can buy pre-made DTF transfers with themes like florals, quotes, band art, or even cosplay designs. Some sellers offer custom prints where you can upload your own artwork or text.
To apply a DTF transfer, preheat your denim with the iron, place the transfer face-down on the fabric, and press firmly for the recommended time (usually 10 to 30 seconds). The adhesive activates with heat and pressure, so make sure the iron’s making good contact across the whole design. Let it cool completely before peeling off the backing sheet. If you skip cooling, the design can smudge or lift.
If you’re using a household iron instead of a heat press, use firm pressure and keep the iron moving slowly across the transfer. Test the heat setting on a scrap piece of denim first to make sure you’re not scorching the fabric or melting the adhesive.
Pin-Based Personalization (Pins/Safety Pins)
Pins and safety pins are the ultimate no-commitment customization. You can rearrange them whenever you want, swap them out seasonally, or change the whole look depending on your mood. Enamel pins are popular because they’re colorful, detailed, and easy to find in every theme: music, nature, food, humor, activism, pop culture.
Safety pins can also be decorative, especially if you’re going for a punk or grunge vibe. You can line them up along a collar, cuff, or pocket, or use them to attach fabric scraps, ribbons, or chains. The nice thing about pins is you’re not altering the jacket permanently, so if you get tired of a look, you just take the pins off and start over.
Here are four common beginner mistakes to avoid:
- Not securing patch edges, which leads to peeling after washing
- Using too much heat on DTF transfers and scorching the denim
- Skipping the prewash and ending up with sizing that blocks adhesion
- Placing heavy embellishments on thin or stretched areas where they’ll sag
Easy Sewing-Based Denim Jacket Upcycling Ideas
If you’re comfortable with basic hand sewing or have access to a sewing machine, you can try techniques that add more detail and durability. These take a bit more time than no-sew options, but they give you more control over placement, color, and texture. You don’t need to be an expert. Just knowing how to thread a needle and make a straight stitch is enough.
Simple Floral Embroidery Accents
Embroidery is easier than it looks. Denim’s thick enough to hold stitches well without needing a hoop. You can add small floral designs to pockets, collars, or cuffs using just embroidery floss and a needle. Start with simple stitches like backstitch for stems and outlines, and French knots for flower centers. A small design on a front pocket takes about 30 to 90 minutes depending on how detailed you go.
Pockets are a good place to start because they’re flat and easy to reach. You can sketch your design lightly with a fabric pen or chalk marker, then stitch over the lines. If you make a mistake, you can either unpick the thread or just work it into the design. Embroidery’s very forgiving that way.
Practice on scrap fabric first if you’ve never done it before. Once you get the rhythm of pulling the thread through and keeping your stitches even, you’ll feel more confident working directly on the jacket.
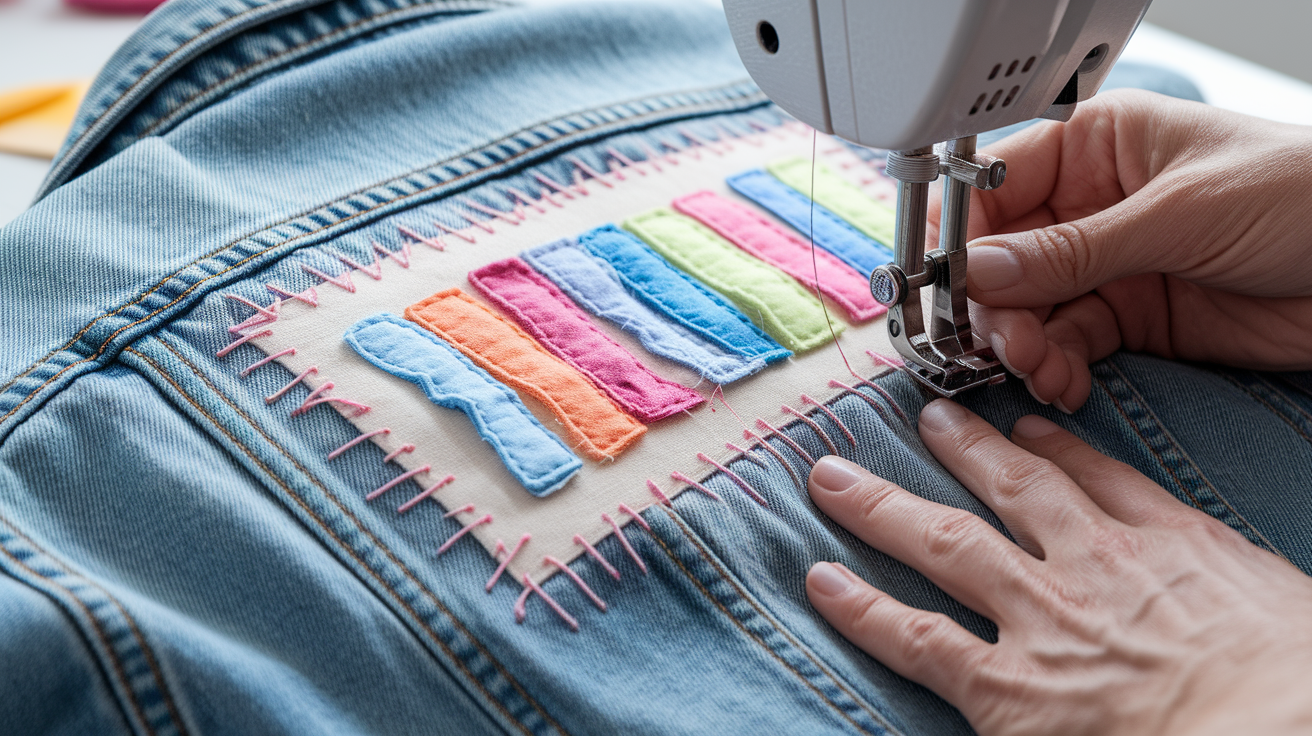
Patchwork Back Panel
A patchwork panel is a bigger project, but it’s still beginner-friendly if you take it one step at a time. Start by cutting 2.5″ strips from fabric scraps and sewing them together into a loose rectangular panel that covers part or all of the jacket back. The panel gets pinned to the jacket, then hand-quilted or machine-stitched in place.
Because you’re only sewing through two layers (the patchwork and the jacket), you don’t need to worry about hiding knots or batting like you would in a traditional quilt. You can use visible stitching as part of the design, like big X stitches in embroidery floss.
After the panel is quilted down, trim the edges, leaving at least a ½” seam allowance. Fold that seam allowance under, press it flat with your fingers or an iron, and sew it down with small hand stitches less than 1/8″ long. This finishing step keeps the raw edges from fraying and gives the panel a clean look.
Here are five sewing tips that make a difference:
- Use thread that matches your denim color so stitches blend in where you don’t want them to show
- Double or triple knot your thread ends to prevent unraveling after washing
- Reinforce edges and corners with extra stitches since those areas get more wear
- When sewing around curves like armholes, leave a little extra fabric and ease it into place as you stitch
- Always test stitches or adhesives on scrap denim first to see how they’ll look and hold up
Creative Painting and Bleaching Ideas for Denim Jacket Upcycling
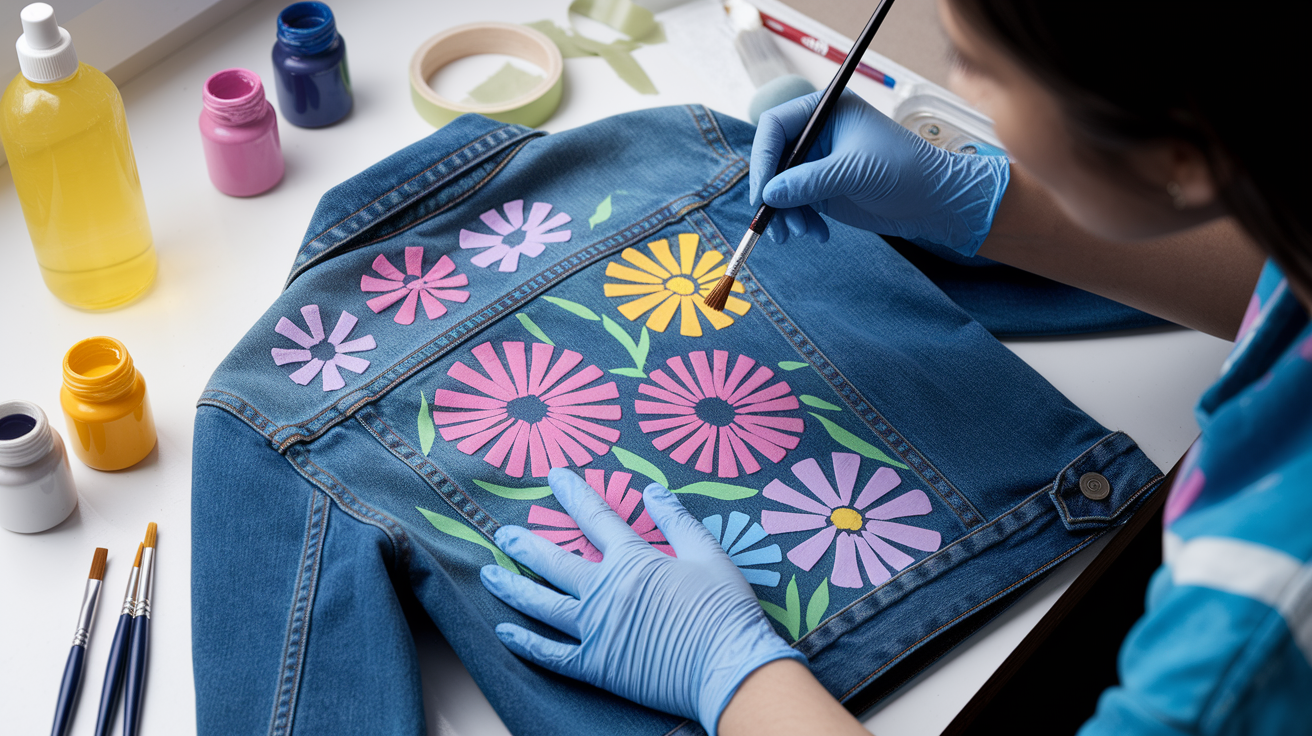
Painting and bleaching are some of the most dramatic ways to customize a jacket, and they don’t require sewing skills at all. Denim holds paint well, especially if you prep the surface by washing it first. Bleach creates instant color contrast that’s hard to get any other way. Both methods let you add large-scale designs or subtle accents depending on your style.
For painting, fabric paint or acrylic mixed with fabric medium works best. Fabric paint stays flexible after it dries and won’t crack when you move, which is important for a jacket you’re actually going to wear. Acrylic paint alone can stiffen the fabric, but adding fabric medium fixes that. You can use brushes for detailed designs, sponges for texture, or even your fingers for a looser, more organic look.
Bleach techniques range from simple dip-dye (where you dip part of the jacket in a bleach solution) to spray patterns where you mist bleach onto the denim for a speckled effect. Acid bleaching gives you more control over the tone and speed of lightening. Always work in a well-ventilated space, wear gloves, and rinse the jacket thoroughly after bleaching to stop the chemical reaction. Testing on a scrap piece of denim helps you predict how light the fabric will get and how long it takes.
If you want your painted or bleached design to last, seal it. For paint, you can heat-set the design by ironing it on the reverse side or tossing the jacket in a dryer on low heat for 20 minutes. For bleach, a thorough rinse and wash stops the lightening process and removes any leftover chemicals that could weaken the fabric over time.
Here are six pattern ideas to try:
- Quotes or song lyrics in block letters across the back
- Florals and leaves scattered along sleeves or shoulders
- Geometric patterns like triangles, stripes, or grids
- Paint splatter for a chaotic, artistic vibe
- Ombre or gradient bleaching from dark to light at the hem
- Seasonal designs like fall leaves, winter snowflakes, or spring flowers
| Method | Materials Needed |
|---|---|
| Hand painting | Fabric paint, brushes, cardboard insert, sealer |
| Bleach dip-dye | Bleach, bucket, gloves, water for rinsing |
| Bleach spray | Bleach, spray bottle, gloves, drop cloth or outdoor space |
Embellishment Ideas to Upgrade a Denim Jacket with Texture and Detail

Embellishments add a tactile, three-dimensional quality that paint and patches can’t replicate. They catch the light, create movement, and make the jacket feel more special and personalized. Adding beads, lace, fringe, or layered fabrics turns a basic denim jacket into something that feels handmade and one-of-a-kind.
Texture upgrades work especially well on denim because the fabric’s sturdy enough to support the weight of beads, sequins, or heavy trim without sagging. The contrast between the rough, matte surface of denim and shiny or soft embellishments also creates visual interest. Even a small amount of embellishment can make a big impact if it’s placed thoughtfully.
Beads, Pearls & Sequins
Beading can be as simple as sewing a line of beads along a pocket edge or as complex as covering an entire sleeve in geometric patterns. Pearls and sequins add dimension and shine, and they’re easier to attach than they look. Thread a needle, knot the end, and sew each bead or sequin individually, passing through the denim and back up through the bead. For durability, use a double thread and make sure your knots are tight.
Beading works best on flat, stable areas like collars, pockets, and cuffs. Avoid high-stress zones like underarms or elbow bends where the thread might snap. You can also glue larger flat-backed gems or pearls using fabric glue, but sewing gives you more control and lasts longer.
Lace, Fringe & Trim
Fringe adds movement and a bit of country or rocker energy depending on how you style it. Rhinestone fringe is popular for a flashier look, while plain fabric fringe gives you a softer, more bohemian vibe. You can sew fringe along the bottom hem, down the sleeves, or across the shoulders. It’s also easy to remove if you change your mind later.
Lace softens the silhouette of a denim jacket and creates a feminine contrast. You can sew lace panels into the back, add lace sleeves, or use lace trim along pockets and collars. Some people even combine denim with lace to create a kimono-style jacket by cutting and reshaping the original piece.
Appliqué & Layered Fabrics
Appliqué is the technique of sewing one piece of fabric onto another to create a design. You can cut shapes like flowers, stars, or abstract forms from colorful fabric and stitch them onto your jacket. Reverse appliqué, where you cut a window in the denim and sew a contrasting fabric underneath, adds even more depth.
Layering fabrics lets you combine textures: wool patches on denim, mesh inserts on the back, or flannel pockets on the front. You can use contrast stitching in a bright thread color to highlight the seams and make the layering more obvious. This technique works well if you’re repurposing scraps from other sewing projects.
Here are five safety and durability tips:
- Sew embellishments with a strong thread like buttonhole thread or doubled regular thread
- Add extra knots at the start and end of each line of stitching to prevent unraveling
- Reinforce edges where fringe or lace attaches with a line of topstitching or zigzag stitch
- Avoid placing heavy beads or sequins in areas that rub against bags, seatbelts, or furniture
- Test adhesives on scrap denim to make sure they don’t soak through or discolor the fabric
Planning and Designing Your Denim Jacket Upcycle
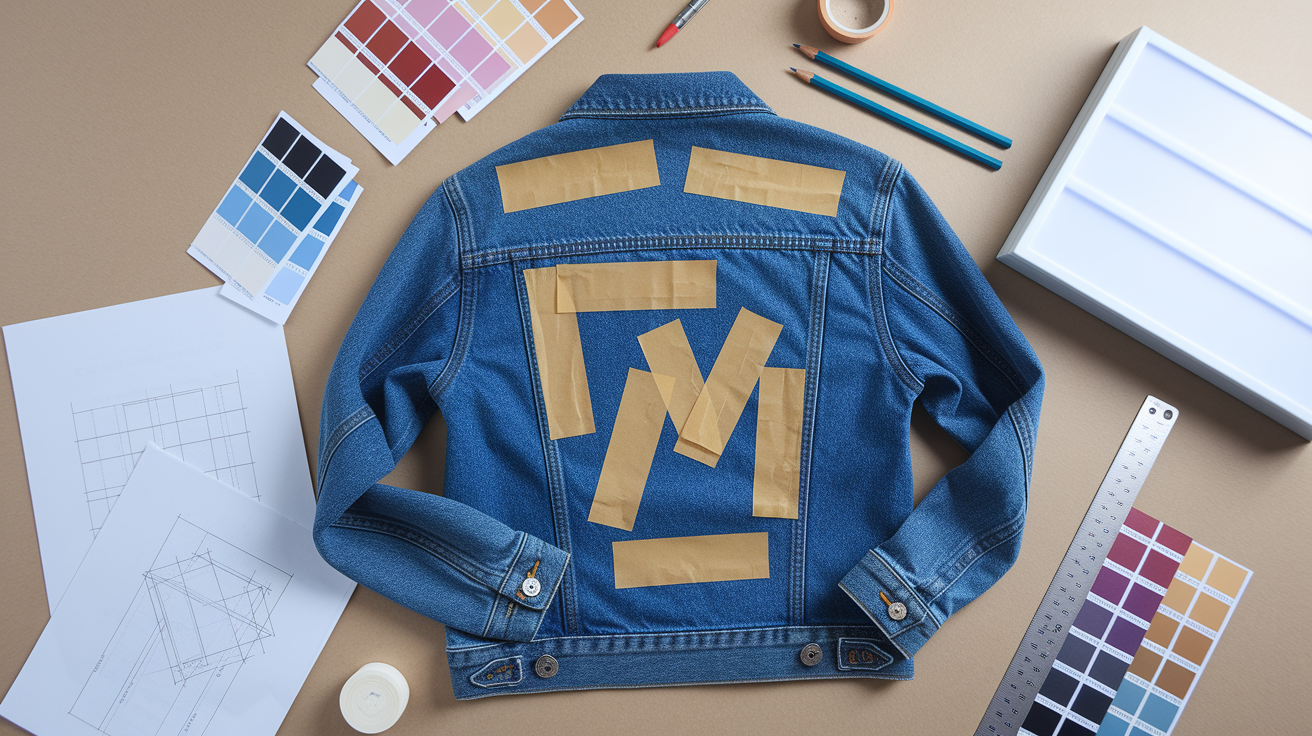
Planning your design before you start stitching or painting saves time and prevents mistakes. You don’t need a perfect sketch, but having a rough idea of where things will go helps you avoid awkward placement and makes sure the finished jacket looks balanced. Even ten minutes with a pencil and paper can make the difference between a project you love and one that feels off.
Sketching your design on paper first lets you experiment with different layouts without committing to anything permanent. You can try out color combinations, test different placements for patches or embroidery, and figure out whether you want a bold focal point on the back or smaller accents scattered across the whole jacket. If you’re not confident drawing, lay the jacket flat and use masking tape or cut paper shapes to mock up where things will go.
Here are six common themes that work well for beginners:
- Florals and botanical designs (leaves, vines, flowers, cacti)
- Quotes or song lyrics that mean something to you
- Seasonal themes like autumn leaves or winter snowflakes
- Abstract art with paint splatters, geometric shapes, or color blocks
- Band logos, patches, and music-inspired graphics
- Nature motifs like mountains, stars, moons, or animals
Beginners often skip prewash, which can cause paint to bead up or patches to peel. They also tend to place designs too close to seams or curved areas like armpits, where the fabric shifts and stretches. If you’re planning embroidery or a patchwork panel, measure and mark your placement carefully. Account for the fact that jacket backs are usually curved to create a slimming shape, so a rectangular panel might need extra fabric to ease around those curves without puckering.
Final Words
Start making your jacket your own with the simple, low-cost techniques above: patches, no-sew transfers, basic embroidery, painting and bleaching, fringe and beading. You also got a short supplies list, quick no-sew picks, sewing basics, and planning steps so projects stay doable.
Pick one idea, test it on thrifted denim, and give yourself a short weekend or two evenings. These upcycling denim jacket ideas for beginners are made to be low-stress and satisfying.
Have fun, and enjoy wearing something only you made.
FAQ
Q: What are the easiest denim jacket upcycling techniques for beginners?
A: The easiest denim jacket upcycling techniques for beginners are adding iron-on or sew-on patches, simple hand embroidery on pockets, hand painting small motifs, basic bleach effects, fringe trim, and easy beading for quick impact.
Q: What basic supplies do I need to start upcycling a denim jacket?
A: The basic supplies you need include scissors, needles and thread, embroidery floss, fabric paint, iron or heat press, chalk marker, measuring tape, pins, adhesive patches, and scrap fabric for testing.
Q: What no-sew options work well for total beginners?
A: No-sew options that work well include iron-on or adhesive patches, ready-to-press DTF transfers (heat-applied), and pin-based personalization using decorative pins or safety pins for rearranging designs easily and quickly.
Q: How long do typical beginner upcycling projects take?
A: Typical beginner upcycling projects take from 15 minutes for an iron-on patch or pin layout, 30–90 minutes for small embroidery or painting, up to a few hours for larger bleach or beading work.
Q: How do I secure iron-on patches and DTF transfers so they don’t peel?
A: To secure iron-on patches and DTF transfers, press with recommended heat and time, press edges firmly, let cool fully, and reinforce high-stress spots with hand stitching or seam sealant for longer wear.
Q: Can I safely bleach or paint denim at home, and what should I test first?
A: You can safely bleach or paint denim at home by testing on a scrap or inside seam first, prewashing the jacket, using gloves and ventilation, and following dye or bleach timing to predict color results.
Q: What simple embroidery designs work best on denim pockets?
A: Simple embroidery designs that work best on denim pockets are small florals, single-line stems, stars, or initials using backstitch and French knots; these take 30–90 minutes and give quick, visible impact.
Q: How do I add fringe, beads, or lace without damaging the jacket?
A: To add fringe, beads, or lace without damage, attach trims to low-stress areas, back them with small reinforcing stitches, knot thread securely, and avoid heavy embellishments near seams or pockets that get a lot of wear.
Q: Where’s the best place to find cheap denim jackets to practice on?
A: The best places to find cheap denim jackets to practice on are thrift stores, flea markets, and clearance racks; many jackets are very affordable and great for experimenting without worrying about mistakes.
Q: What common beginner mistakes should I avoid when upcycling denim?
A: Common beginner mistakes to avoid are skipping prewash, placing decorations over curved seams, not testing paints or bleach first, relying only on adhesive for high-stress areas, and overcrowding the design.
Q: Do I need to prewash my denim jacket before upcycling, and why?
A: You do need to prewash your denim jacket before upcycling because it removes factory sizing, reduces color bleed from paint or bleach, and gives truer results when applying patches, paint, or transfers.
Q: How can I plan a balanced design for my jacket so it looks intentional?
A: To plan a balanced design, sketch ideas on paper, test placement with chalk or pins, start with focal points like pockets or back panel, maintain color and theme consistency, and step back to adjust spacing.