


You don’t have to choose between a mounted TV and losing your security deposit.
If you’re renting, drilling into walls feels risky and expensive.
Good news: real no-drill mounts now give you a clean, stable setup that comes down with no damage.
From pillar wraps and freestanding stands to heavy-duty adhesives and tension poles, each method works for different walls and TVs.
This guide shows which no-drill options fit your space, what to check before you buy, and simple step-by-step tips to install without a fight with your landlord.
Immediate No-Drill Options for a Secure TV Setup in a Rental

When you’re renting and want your TV mounted, dealing with landlord approval feels like more trouble than it’s worth. Good news: wall mounting TV in rental without drilling has evolved. There are actual solutions now that look clean, keep your screen stable, and leave nothing behind when you move. No-drill mounting breaks down into four types: pillar wraps, freestanding stands with brackets, industrial adhesive systems, and floor-to-ceiling tension rods. Each works differently depending on your space and wall type, so the right choice depends on what you’re dealing with in your rental.
Pillar mounts strap around existing columns (round, square, whatever shape) and hold TVs from 32 inches up to 70 inches. They install in minutes with clamps or tension straps, give you full-motion adjustment like premium wall mounts, and remove without a trace. If your apartment or patio has structural posts, this is one of the cleanest renter-friendly setups you’ll find. Freestanding TV stands with VESA-compatible brackets give you that mounted look without touching the wall. They work anywhere, need no landlord approval, and usually include shelves for your streaming box and soundbar. Adhesive mounts use industrial-strength bonding (3M VHB tape and similar) to hold your TV on smooth surfaces, but surface prep matters a lot, and removal needs careful attention to avoid peeling paint or tearing drywall. Tension rod systems create a pressure column between floor and ceiling, holding the TV without drilling, but they need flat, solid ceilings and regular checks to prevent slipping.
These temporary TV mount options matter beyond just convenience. They save you money. Drilling into rental walls without permission can trigger repair bills of $100 to $300 per hole. If you hit hidden wiring or plumbing, the damage-free installation you thought you were doing becomes a deposit disaster. Moisture getting through poorly sealed holes can lead to mold, which landlords will definitely catch during move-out. Sticking with true no-drill methods protects your wallet and keeps things simple with your landlord.
Five fastest no-drill options:
- Pillar wrap mount – Strap around a column, tighten clamps, hang TV in under 10 minutes
- Freestanding stand with VESA bracket – Unbox, attach TV to bracket, adjust height, done
- Adhesive TV mount – Clean surface, apply bonding strips, press mount into place (curing time varies)
- Floor-to-ceiling tension pole – Extend pole, tighten compression, attach bracket, hang screen
- Portable entertainment center – Assemble frame, mount TV to integrated bracket, plug in
Evaluating Rental Walls Before Choosing a No-Drill TV Mount
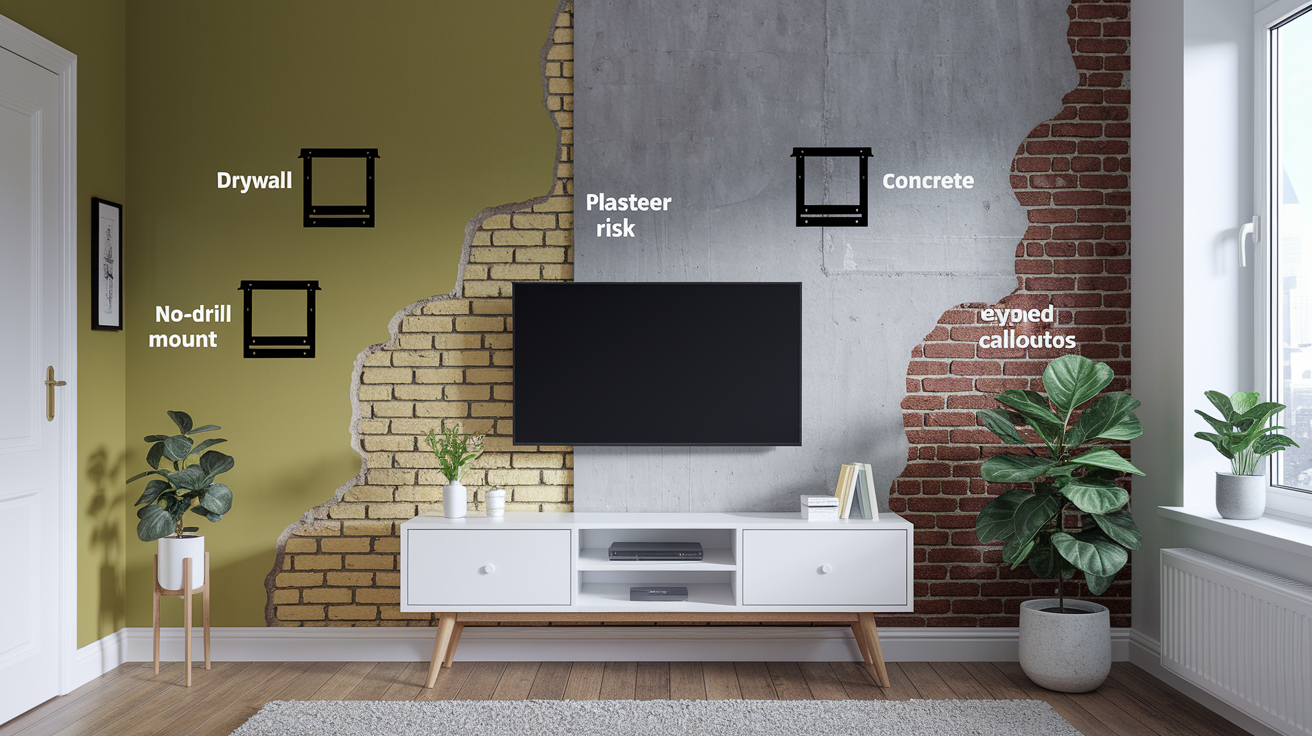
Before you commit to any no-drill system, you need to know what your walls are made of. Not every surface works with every solution. Drywall is the most common rental wall type. It’s smooth enough for adhesive mounts if the paint’s in good shape and there’s no texture. Plaster walls, especially older ones, have an uneven surface that makes adhesive bonding sketchy. The lath underneath also means you can’t predict what’s behind the wall if you’re tempted to drill. Concrete and exposed brick are too porous and irregular for most adhesives, but they’re great candidates for freestanding stands or pillar mounts if columns are around. If your rental has textured walls (popcorn, knockdown, orange peel), adhesives won’t hold safely. Texture creates air gaps that wreck the bond, and tension systems struggle on ceilings with the same finishes.
The biggest risk of guessing wrong is a TV coming off the wall. The second biggest is damaging the property and losing your deposit. Drilling into unknown walls can hit electrical wiring or plumbing. Even if you avoid utilities, moisture can seep through unsealed holes and cause mold or structural damage over time. If you’re not confident identifying your wall type, choosing a freestanding stand or pillar mount gets rid of the risk completely. You’re not relying on the wall at all.
Quick wall type checks:
- Tap test – Drywall sounds hollow, plaster sounds dense and solid
- Magnet test – If a magnet sticks, you’ve found a metal stud (common in newer builds)
- Surface feel – Smooth and painted suggests drywall, rough or cool to the touch suggests plaster, concrete, or brick
- Age of building – Pre-1950s homes often have plaster over lath, post-1950 builds typically use drywall
Renter-Friendly Pillar and Post Mounting Solutions
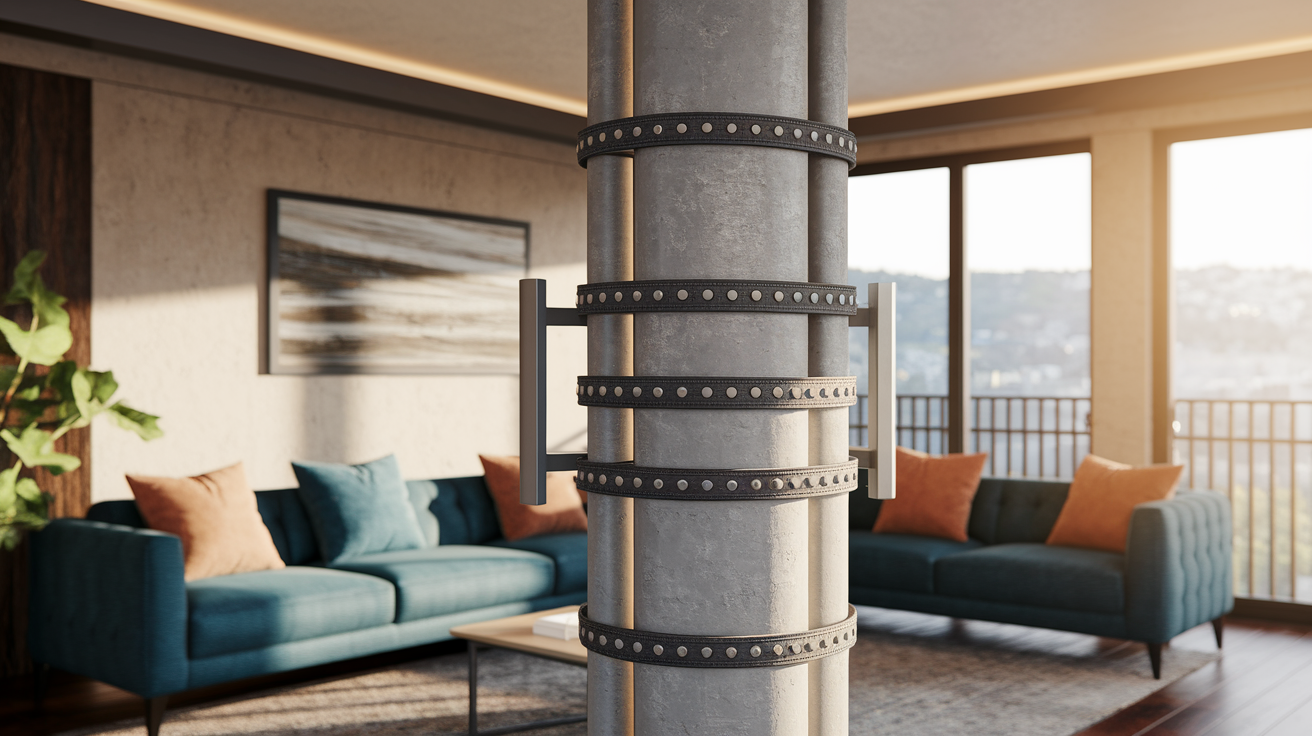
If your rental has a structural column, decorative post, or even a support beam in the living room or on a covered patio, a pillar mount is one of the smartest no-drill mounting solutions out there. These systems work by wrapping heavy-duty straps or clamps around the column (round, square, irregular shapes all work) and using adjustable tension to lock the mount in place. Medium-duty models support TVs from 37 inches up to 70 inches. Because the load gets distributed around the entire circumference of the post, the setup is stable enough to handle full-motion articulation. You get the same swivel, tilt, and extension you’d expect from a premium wall mount. Installation takes minutes instead of an hour. When you move out, you unbuckle the straps and the column looks exactly like it did when you moved in.
Pillar mounts work indoors and outdoors. If you have a gazebo, covered patio, or pergola with posts, you can create an outdoor TV setup without drilling into stucco or siding. The clamps are usually padded to prevent scratches. Most kits include all the hardware you need with no specialized tools required. This makes pillar systems a great fit for renters who want that mounted look and full viewing angle optimization but don’t want to negotiate with a landlord or risk their deposit on wall repairs.
Weight and Stability Considerations
Before you buy any pillar mount, confirm that your TV’s weight falls comfortably below the mount’s rated capacity. Don’t rely on “fits TVs up to 70 inches” marketing alone. Screen size and weight don’t always match. Check your TV’s manual or the sticker on the back for the exact weight, then choose a mount rated at least 20% higher. VESA compatibility is just as important. VESA is the standard spacing of the four mounting holes on the back of your TV. If the mount’s bracket doesn’t line up with those holes, the system won’t work. Common VESA patterns are 200×200, 400×400, and 600×400 (measured in millimeters). Double-check both the TV spec and the mount spec before ordering.
The wrap-around design distributes weight evenly around the post. That’s why pillar mounts can safely handle larger screens without wobbling. Tension is what holds everything in place. After installation, give the TV a gentle shake test to confirm there’s no play or movement. If the mount shifts, tighten the straps or clamps incrementally until the system feels rock-solid.
Freestanding TV Stands for Renters Wanting a Mounted Look

A modern freestanding TV stand with a built-in VESA bracket is the closest thing to a universal renter solution. It works in any apartment, requires zero landlord approval, and when you move, you just unplug and go. These aren’t the bulky entertainment centers from the ’90s. Today’s stands use a vertical column with an adjustable-height bracket that mounts your TV just like a wall system would, complete with cable routing down the post so wires stay hidden. Many models include a shelf or two for your soundbar, streaming box, and game console. Because the entire load rests on the floor, you don’t have to worry about wall type, surface prep, or whether your drywall can handle the weight.
The tradeoff is footprint. Freestanding stands take up floor space. Maximum height is limited compared to wall or pillar mounts. Most top out around 60 to 65 inches from the floor. That’s fine for standard living room setups, but if you want the TV higher (like over a fireplace or in a bedroom where you watch from bed), a stand won’t get you there. Stability depends on base design. Look for wide, heavy bases with a low center of gravity. If the stand has casters for mobility, make sure they lock securely. A wobbly stand is a tipping hazard, especially in small spaces with kids or pets.
Five features to check before buying a freestanding stand:
- Weight rating – Confirm it exceeds your TV’s actual weight, not just the screen size
- VESA compatibility – Match the bracket’s hole pattern to your TV’s mounting holes
- Height adjustability – Ensure the range lets you position the screen center near seated eye level
- Cable routing – Built-in channels or clips keep wires organized and out of sight
- Base design – Wide footprint and low center of gravity prevent tipping, locking casters add safety if the stand is mobile
Adhesive and Tension-Based No-Drill Mounting Systems

Adhesive mounts sound like the dream solution. Stick your TV on the wall, no holes, no fuss. But they come with real risk if you don’t match the product to the surface correctly. Industrial-strength bonding systems like 3M VHB tape can hold substantial weight, but only on smooth, non-porous, clean surfaces. If your rental has textured paint, uneven drywall, or any kind of wallpaper, the bond won’t be reliable. The leverage from a TV mounted off-center can peel the adhesive (and the paint or drywall paper) right off the wall when you try to remove it. Surface prep is critical. Wipe the wall with isopropyl alcohol, let it dry completely, and follow the manufacturer’s instructions for curing time before hanging the TV. Even then, adhesive mounts are better for smaller, lighter screens. Think under 40 inches. The bigger the TV, the more torque it puts on the bond.
Tension rod systems take a different approach. They create a floor-to-ceiling pressure column, kind of like a tall shower caddy. The TV bracket attaches to that column instead of the wall. Because the load is supported by compression between the floor and ceiling, there’s no wall contact at all. The catch is that your ceiling has to be flat, solid, and the right height. Textured or suspended ceilings don’t work. If the pole isn’t tensioned correctly, it can slip over time. You’ll need to check and re-tighten the system periodically, especially in the first few weeks after installation. Tension mounts work well in apartments with standard 8 to 10-foot ceilings and smooth finishes, but they’re not universal.
| Method | Pros | Limitations |
|---|---|---|
| Adhesive strips | No hardware, fast install, leaves no holes | Requires smooth surface; removal can peel paint; weight limits lower; curing time needed |
| Tension pole | No wall contact, supports larger TVs, adjustable height | Needs flat ceiling and floor; periodic tightening; won’t work on textured or suspended ceilings |
| Pressure bracket | Minimal tools, reversible, some allow minor articulation | Limited weight capacity; relies on friction; slippage risk if not properly secured |
Safety Guidelines for No-Drill TV Mounting in Rentals
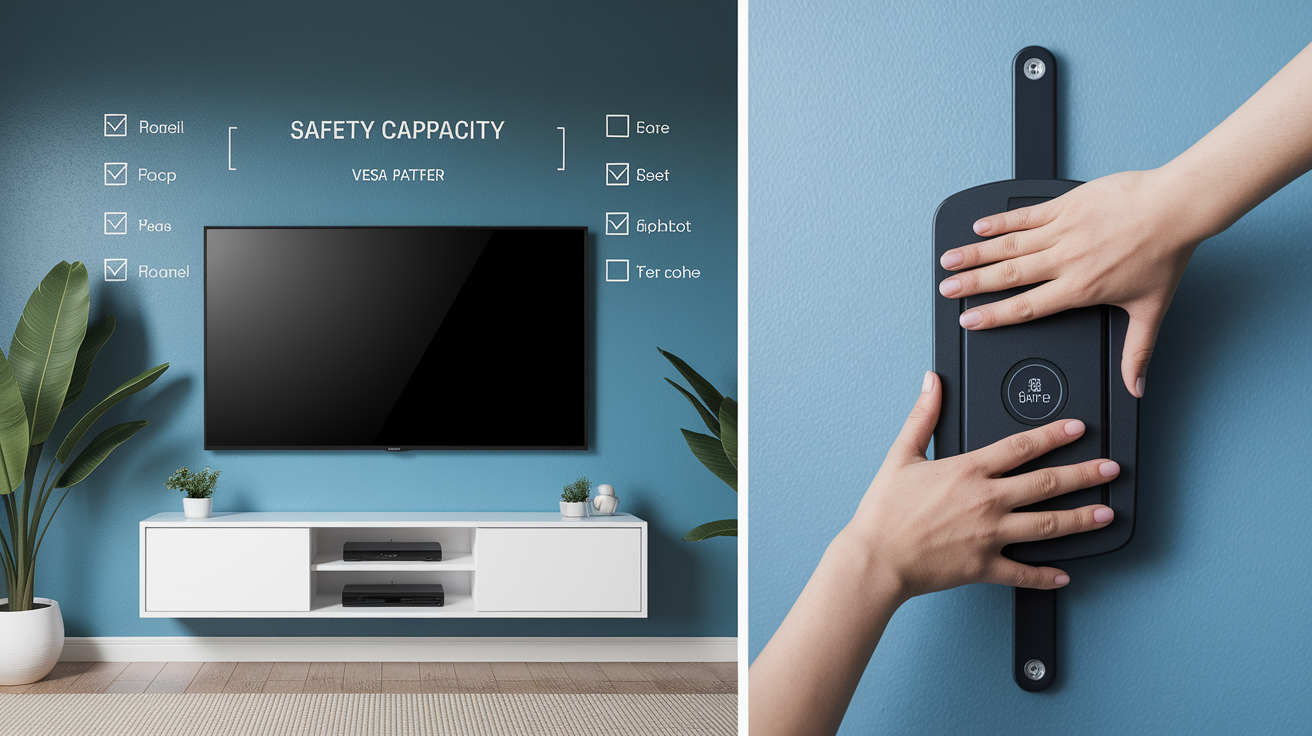
No matter which no-drill system you choose, confirming your TV’s weight and VESA pattern is step one. Every mount has a maximum weight capacity and a specific set of VESA hole spacings it can accommodate. If either one is off, the system won’t hold the TV safely. Check the sticker on the back of your TV or the manual for both numbers, then cross-reference them with the mount’s specs before you buy. If your TV weighs 45 pounds and the mount is rated for 50, that’s too close. Aim for at least a 20% safety margin.
Uneven load distribution is the most common cause of no-drill mount failures. With adhesive systems, make sure the bonding surface is completely clean and flat, and allow the full curing time before hanging the TV. With tension poles, confirm the pole is perfectly vertical and tightened according to the instructions. Leaning or under-tensioned poles will slip. Freestanding stands need a wide base. If the stand wobbles when you nudge it, it’s not safe. Lock any casters before placing the TV. Consider using furniture anchors or anti-tip straps if you have kids or pets. Periodic checks are especially important for tension and pressure systems. Give the mount a quick shake test every few weeks to make sure nothing has loosened.
Six essential safety checks:
- Confirm TV weight is at least 20% below the mount’s rated capacity
- Verify VESA pattern matches exactly between TV and mount bracket
- Ensure adhesive surfaces are smooth, clean, and fully cured before hanging the screen
- Check that tension poles are vertical and tightened to manufacturer spec
- Use a wide-base freestanding stand and lock all casters before placing the TV
- Inspect mount stability every few weeks, especially in the first month after installation
Cost Comparison of No-Drill Mounting Solutions for Renters
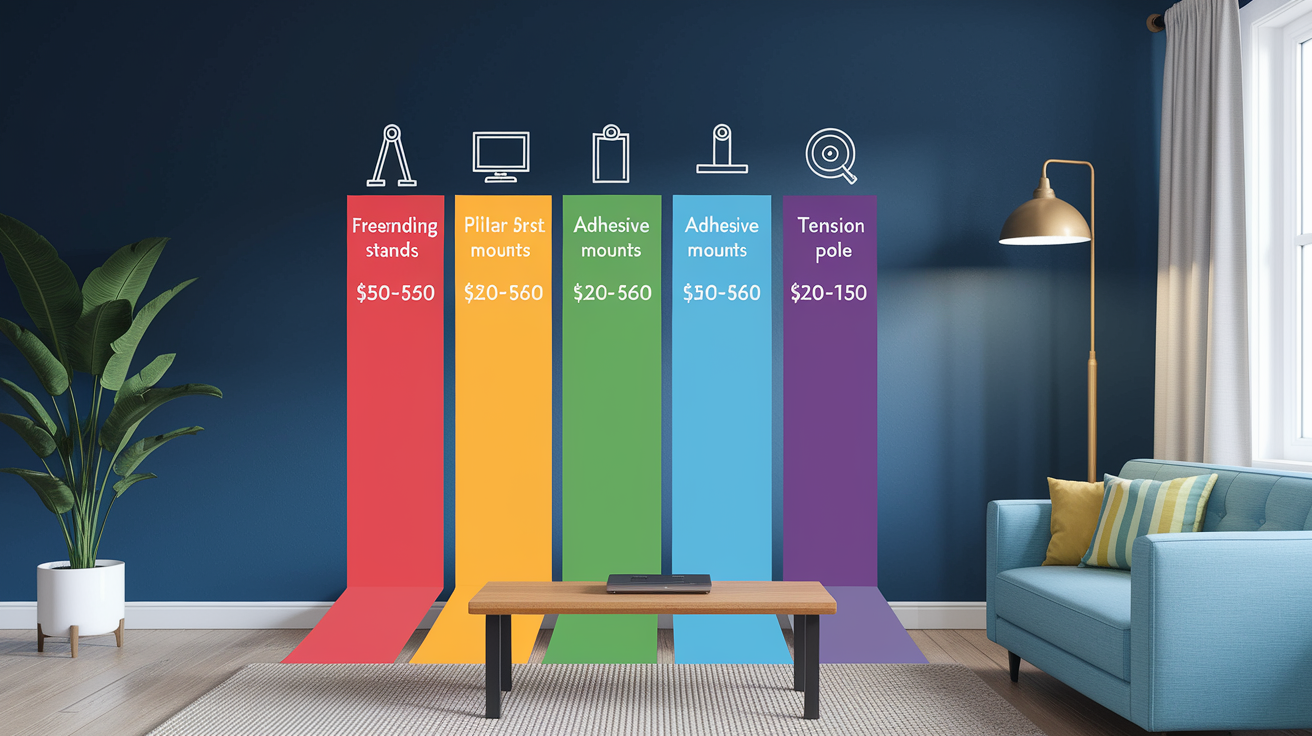
Freestanding TV stands are typically the most budget-friendly option. Basic models start around $50. Premium versions with adjustable height, cable routing, and shelves run $150 to $250. They require no tools and no special installation skills. Unbox, assemble the base, attach the bracket to your TV, done. Pillar and post mounts cost more because they’re specialized hardware, usually in the $100 to $200 range for a medium-duty model that supports up to 70-inch screens. Installation is still fast. Most people finish in under 20 minutes. But you’re paying for the engineering that makes wrap-around tension stable enough for full-motion use. Adhesive systems are inexpensive, often $20 to $60 for a set of industrial-strength strips or bonding plates. But the real cost is risk. If removal damages your walls, you’re looking at repair bills that can easily hit $100 or more, which wipes out any savings.
Tension rod systems fall in the middle, typically $80 to $150. They mimic wall-mount performance without touching the walls. Install time is slightly longer than pillar mounts because you need to measure ceiling height, extend the pole carefully, and ensure proper tension. But it’s still a one-person job that takes less than an hour. When you compare these options to hiring a handyman for traditional wall mounting (which can run $100 to $200 for labor alone, plus the cost of the mount and the risk of deposit-eating wall repairs), budget-friendly alternatives start to look a lot smarter.
Four typical price ranges for no-drill solutions:
- Freestanding stands – $50 to $250, depending on features and build quality
- Pillar/post mounts – $100 to $200 for adjustable, full-motion models
- Adhesive mounts – $20 to $60 for strips or bonding plates (plus potential wall repair costs)
- Tension pole systems – $80 to $150, including bracket and hardware
Preparing for Move-Out: Ensuring a Damage-Free Return

The whole point of choosing a no-drill TV mount is to leave the rental in original condition, so move-out prep should be straightforward. Pillar and post mounts unbuckle and lift off. Literally zero trace left behind. Freestanding stands unplug and roll or carry out. Tension poles release with a twist or lever, leaving nothing but a small contact mark on the ceiling and floor that disappears with a quick wipe. Adhesive mounts are the only no-drill option that requires extra care. Follow the manufacturer’s removal instructions exactly, usually involving a slow peel or a specific release method, to avoid tearing paint or drywall paper. If you skip that step and just yank the mount off, you’re looking at patching, sanding, and repainting. Exactly the kind of repair that costs you part of your security deposit.
Documentation is your friend. Take photos of the walls, ceiling, and floor before you install anything, and take another set after you remove the mount and clean up. If your landlord tries to claim damage that wasn’t there, you’ll have proof. Keep the original packaging and instructions for your mount. If you’re moving to another rental, you can reinstall the same system in the new place. Keeping everything organized makes that process faster. And remember, wall repairs from drilled holes can run $100 to $300 per hole. Even if your no-drill system cost a bit more upfront, you’re still saving money by avoiding those bills.
Four steps for move-out readiness:
- Take before-and-after photos of all walls, ceilings, and floors where the mount was installed
- Follow adhesive removal instructions carefully to prevent paint or drywall damage
- Wipe contact points on tension poles and pillar mounts to remove any dust or residue
- Save all packaging, hardware, and instructions for reuse in your next rental or resale
Final Words
Pick a no-drill option and get your TV up this weekend. Pillar/post mounts, tension poles, adhesive systems, and freestanding stands all work fast and leave walls intact.
Before you install, check wall type, VESA and weight limits, and follow the safety checks. Compare price and practice removal so your deposit stays safe.
Follow the simple steps above and wall mounting TV in rental without drilling becomes a straightforward, low-risk upgrade. You’ll have a neat, renter-friendly setup that actually makes your space feel better.
FAQ
Q: How to mount a TV without drilling renter friendly?
A: Mounting a TV in a rental without drilling is possible with pillar/post mounts, freestanding TV stands, adhesive mounts for smooth walls, or floor-to-ceiling tension poles, so pick by TV size, surface, and permanence.
Q: Can I wall mount a TV in a rental without?
A: Wall-mounting a TV in a rental without drilling is doable, but check your lease and landlord first, and use no-drill options that mimic wall mounts to keep walls intact and protect your deposit.
Q: Can I hang my TV on the wall without drilling holes?
A: Hanging a TV without drilling holes depends on the surface; adhesives need smooth non-porous walls, tension poles need flat ceiling and floor, and pillar mounts need a column, while rough plaster or brick often make adhesives fail.