


Stop watering on a schedule—it’s probably killing more houseplants than it helps.
Soil moisture sensors take the guesswork out of watering by reading the root zone where water actually matters.
They give a simple number you can act on, so you don’t drown or desert a plant by mistake.
For busy people, renters, and anyone with mixed collections, that means fewer dead roots, steadier growth, and more reliable blooms.
In this post I’ll show how sensors save plants time and stress, and how to pick and place one for your pots.
Key Ways Moisture Sensors Improve Care for Potted Plants

Soil moisture sensors get rid of the guesswork. They deliver real-time readings from the root zone, where water actually matters for plant health. Instead of poking your finger into the top inch and hoping for the best, sensors go deeper, usually about two-thirds down into the pot, and give you a number that shows exactly how much water the roots can access. For tropical houseplants, a steady reading between 35 and 55 percent volumetric water content (VWC) means you’re in the sweet spot. Succulents? They’re happy much drier, around 5 to 20 percent VWC. That kind of precision lets you ditch the watering schedule and just add water when the plant genuinely needs it.
The biggest win is stopping overwatering before it kills your plant. Root rot is the number one killer in container gardens, and it happens when soil stays soaked and roots can’t get oxygen. When a sensor shows 8 or 9 on a 1 to 10 scale, or VWC above 70 percent for days, the soil is flooded. Hold off until the reading drops back into your plant’s comfort zone, maybe 4 to 6 for a monstera or 2 to 3 for a jade, and you keep the roots healthy and breathing. Sensors also catch underwatering early. If the probe sits at 1 or 2 for several days, you know the plant is drying out before the leaves start curling or crisping at the tips.
Stable moisture keeps the plant’s systems running smoothly. Wild swings between bone dry and soaking wet stress the plant, slow growth, trigger leaf drop, and invite pests and disease. A sensor helps you hold that middle ground, adjusting how often you water as the seasons shift and pot temperatures change. You get steadier photosynthesis, stronger roots, and fewer setbacks.
What you’ll notice when you use a sensor:
- Way less root rot because you’re not drowning the roots
- Consistent moisture that lets the plant grow without interruptions
- Fewer stress symptoms like wilting, yellowing, or dropping leaves
- Better growth overall, and more reliable flowering
- Fewer watering mistakes from eyeballing the soil or guessing
Sensors beat manual checks because they measure the water actually available to roots, not just how the surface feels. A pot can look dry on top but still be waterlogged at the bottom. Or a thick root ball can hide deep dryness that your finger will never find. Numeric readings close that blind spot and show you what’s happening where it counts.
How Soil Moisture Sensors Work Inside Potted Soil
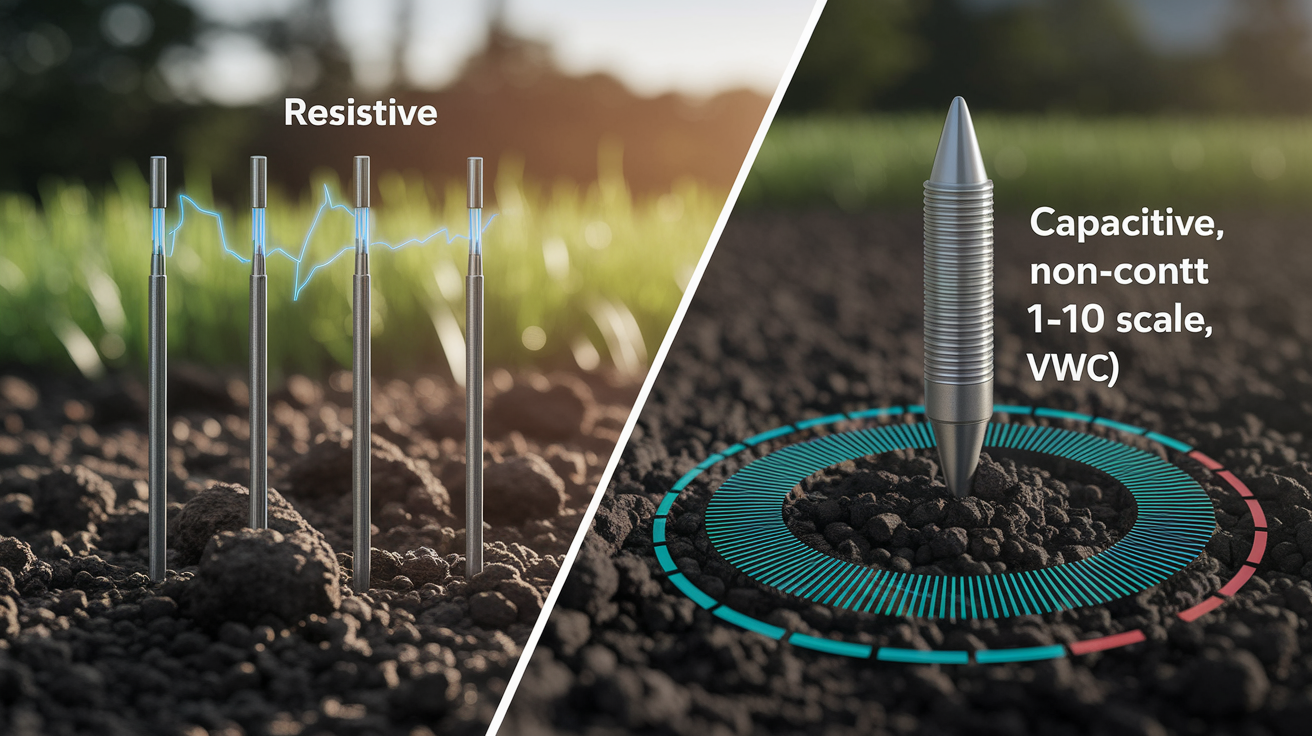
Most home moisture sensors measure electrical properties in the soil to estimate water content. Resistive sensors send a small current between two metal probes. Dry soil resists the current, wet soil lets it flow, and the meter turns that resistance into a moisture reading. Capacitive sensors create an electrical field around a probe that doesn’t corrode, then measure how water molecules change the capacitance. Because capacitive tech avoids direct metal contact with soil, the readings stay accurate longer and the probe doesn’t rust or get gunked up by fertilizer salts the way resistive meters do after a few months.
You’ll see outputs as a 1 to 10 scale, a 0 to 100 percent VWC display, or simple dry/OK/wet LED lights. The real advantage over sticking your finger in the dirt is depth: a probe pushed four to six inches into a pot reads moisture at the active root zone, way below the dry crust you feel when you press the top. Resistive sensors are usually accurate within about ±5 to 10 percent VWC, which works fine for most houseplants. Capacitive sensors tighten that to ±2 to 5 percent, so they’re a smarter pick for plants with narrow moisture windows, like orchids or carnivorous species.
| Sensor Type | How It Works | Typical Accuracy | Notes |
|---|---|---|---|
| Resistive | Measures electrical resistance between two metal probes | ±5–10% VWC | Probes corrode; affected by fertilizer salts; inexpensive ($8–$30) |
| Capacitive | Measures change in electrical capacitance around a non-corrosive probe | ±2–5% VWC | Longer-lived; stable in fertilized soil; mid-range cost ($20–$80) |
| Tensiometer / TDR-FDR | Measures soil tension or uses electromagnetic waves to calculate water volume | ±1–3% VWC | High precision; higher cost ($60–$200+); suited for valuable or finicky plants |
| Multi-function | Combines moisture, pH, light, and temperature sensors in one probe | Varies by sensor | Convenience; may sacrifice individual accuracy for breadth |
Once you’ve got a number, turn it into action. Your tropical foliage plant shows 35 percent VWC and the target is 35 to 55 percent? Wait another day or two before watering. Same plant drops to 25 percent? Water soon. If it’s at 70 percent two days after watering, dial back how often you’re watering and double-check drainage. That loop (measure, compare to target, adjust) replaces calendar watering with responsive care.
Choosing the Right Moisture Sensor for Houseplants
Budget and plant type decide which sensor you should buy. Resistive analog meters start around $8 and top out near $30. They’re fine for casual use, but expect the readings to drift and the probes to corrode if you leave them in the soil long term or use heavy fertilizer. Capacitive digital sensors run $20 to $80, stay stable longer, and handle fertilizer salts without losing accuracy. If you’ve got pricey orchids, rare aroids, or a big indoor garden, tensiometers or advanced volumetric sensors in the $60 to $200-plus range give you lab-quality precision and last for years.
Probe length has to match pot depth. Small 2 to 4 inch pots (think succulents or seedlings) need 1 to 3 inch probes that fit without wrecking roots. Standard houseplant containers in the 4 to 8 inch range work well with 4 to 6 inch probes, which hit the middle root zone. Big floor planters 10 to 18 inches deep need 6 to 12 inch probes to sample moisture where most of the root system lives. A probe that’s too short only reads the dry surface. One that’s too long for the pot hits the drainage layer or pot bottom and gives you a fake wet reading.
Plant moisture preference matters too. Succulents and cacti live at the dry end, 5 to 20 percent VWC or 1 to 3 on a ten point meter, so you want a sensor that’s accurate in that low range and easy to pull out between checks so you’re not constantly disturbing the soil. Orchids, begonias, and ferns like higher, more stable moisture, 40 to 70 percent VWC depending on the species, and they do better with capacitive sensors you can leave in place for continuous monitoring without worrying about rust.
Six things to think about when picking a moisture sensor:
- Probe length needs to reach two-thirds pot depth for accurate root zone sampling.
- Pot size and how many you have. Big collections benefit from tough, reusable capacitive units. Small collections can get by with cheap resistive meters.
- What your plant likes. Succulents need low-range accuracy. Tropicals need stable mid-range readings. Sensitive species justify spending more.
- Budget. Resistive $8 to $30, capacitive $20 to $80, tensiometers/advanced VWC $60 to $200 and up.
- How accurate you need to be. Casual growers can live with ±5 to 10% error. Collectors of fussy plants want ±2 to 5% or better.
- Long-term monitoring. Permanent placement needs non-corroding capacitive or pro sensors. Occasional spot checks let you use cheaper resistive meters.
For most indoor gardeners, a mid-range capacitive sensor with a 4 to 6 inch probe covers the majority of houseplants and pays for itself by saving one or two expensive plants from root rot. If you grow a mix of succulents and tropicals, buy two sensors, one tuned for dry readings, one for moist, so you can dial in each extreme of your collection.
Proper Sensor Placement in the Root Zone of Potted Plants
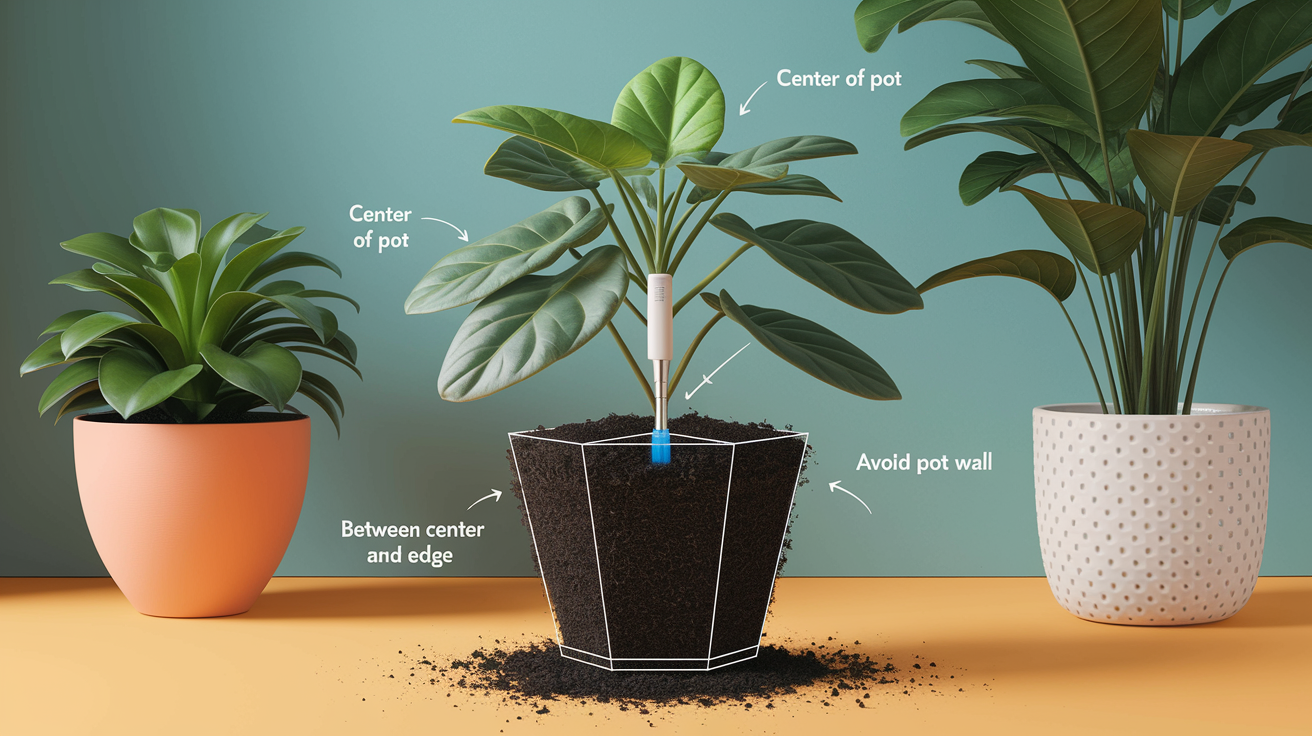
Where you put the probe decides whether you get useful data or garbage. Insert the sensor about two-thirds of the way down from the soil surface to the pot bottom. In a 6 inch pot, that’s roughly 4 inches deep. This zone has the most active roots and shows the moisture actually available to the plant, not the dry crust on top or the puddle sometimes sitting above the drainage layer.
Don’t touch the pot wall. Probes shoved against plastic, ceramic, or terracotta return edge readings (often drier near porous terracotta, wetter near non-porous plastic) that don’t reflect the bulk soil. Aim for the center of the pot or halfway between center and edge, angling the probe gently to slip between root masses instead of forcing it straight down and snapping fine feeder roots. If the potting mix is dense or the plant is root-bound, dampen the soil slightly first or insert the probe slowly while rotating to ease it in.
Five steps for accurate sensor insertion:
- Pick insertion depth. Measure pot height, calculate two-thirds depth, and mark that spot on the probe with tape if you need to.
- Choose insertion point. Insert halfway between pot center and edge, staying at least half an inch away from the wall.
- Angle gently. Tilt the probe 10 to 15 degrees to work around roots and avoid damaging tissue.
- Take multiple readings. Insert the probe in two or three different spots around the pot, wait 10 to 15 seconds per reading, then average the numbers.
- Record baseline values. Write down typical wet (just watered) and dry (ready to water) readings for each plant to build species-specific reference points.
Taking two or three readings and averaging them makes up for uneven watering, layered potting mixes, and random dry or wet pockets. If one spot reads 3 and another reads 7 in the same pot, you know the mix isn’t moving water evenly. That’s a signal to adjust watering technique, check for compaction, or make sure drainage holes aren’t blocked. Consistent multi-point sampling also catches edge effects and gives you confidence the number reflects real root zone conditions.
Interpreting Moisture Readings for Different Plant Species

Numbers only help when you know what range keeps your specific plant alive. Succulents and cacti store water in leaves or stems, handle long dry stretches, and rot fast in wet soil. Target 5 to 20 percent VWC or a 1 to 3 reading on a ten point scale, and only water after the sensor confirms the mix is bone dry several inches down. Tropical foliage plants (pothos, philodendron, monstera, most common houseplants) want consistent moderate moisture in the 35 to 55 percent VWC range, about a 4 to 6 on an analog meter. Seedlings and young edibles need higher moisture, 60 to 80 percent VWC, to fuel rapid cell growth and avoid transplant shock.
Ferns, calatheas, and other moisture lovers thrive between 50 and 80 percent VWC, roughly 6 to 8 on a scale of ten. Orchids depend on type: phalaenopsis like to dry a bit between waterings (30 to 50 percent VWC), while paphiopedilums prefer steadier moisture (40 to 60 percent). Flowering plants often need a short dry spell to trigger bud set, then steady moisture once buds appear. A sensor lets you run that cycle with precision instead of guessing.
After watering, wait 15 to 30 minutes before taking a reading. Fresh water sits in big pores and drainage channels before soaking into the soil matrix, so an instant reading shows fake high moisture. Waiting half an hour lets the mix reach balance and gives you a number that reflects what the roots will see over the next few days.
| Plant Type | Ideal Range | Water When Below |
|---|---|---|
| Succulents and cacti | 5–20% VWC or 1–3 scale | 1–2 (bone dry throughout pot) |
| Tropical foliage (pothos, monstera, philodendron) | 35–55% VWC or 4–6 scale | 3–4 (slightly dry but not wilting) |
| Ferns, calatheas, moisture-loving species | 50–80% VWC or 6–8 scale | 5–6 (do not allow to dry fully) |
| Seedlings and young edibles | 60–80% VWC or 7–8 scale | 6 (maintain frequent light moisture) |
Seasonal shifts are normal. In winter, growth slows and evaporation drops, so many houseplants need watering half as often as they do in summer. If your monstera reads 4 to 6 consistently in July with watering every five days, expect that same range to last eight or nine days in January. Use the sensor to find the new interval instead of sticking to a calendar. The reading tells you when the plant is ready, no matter the season.
Using Moisture Sensors with Self-Watering Pots and Automated Watering

Moisture sensors fit naturally with self-watering containers and automated setups. Self-watering pots use a reservoir and wicking system to pull water up into the root zone, but without a sensor you’re still guessing whether the soil stays in the right range or creeps into the saturated zone. Insert a probe into the upper soil layer (above the wick but within the root zone) to watch whether the wicking rate matches the plant’s water use. If readings stay above 7 or 8, the wick is pushing too much water and you risk root rot. Dial back the reservoir refill or switch to a slower-wicking medium to bring moisture back down.
Smart sensors with wireless connectivity can trigger watering directly. When the reading drops below a preset threshold (say, 4 on a 1 to 10 scale for a tropical plant), the sensor signals a solenoid valve, a small pump, or a smart irrigation controller, which delivers a measured dose of water. Once the sensor confirms the soil has returned to target range, the system stops. This closed-loop approach keeps moisture consistent without daily manual checks, making it practical to manage a big indoor collection or keep plants healthy while you’re traveling.
Common automation setups:
- Sensor plus solenoid valve. Probe monitors soil, valve opens when reading drops below threshold, closes when target is reached.
- Sensor plus peristaltic pump. Low-flow pump delivers precise water volumes triggered by moisture data, great for individual pots.
- Sensor plus smart home hub. Zigbee or Wi-Fi sensors connect with home automation platforms to log data and send alerts or trigger routines.
- Sensor plus timer override. Instead of watering on a fixed schedule, the timer only runs if the sensor confirms soil is dry, cutting waste.
Even in non-automated setups, sensors improve self-watering pot performance by catching problems early. If the reservoir empties but the soil stays dry, the wick has failed or the soil has pulled away from the pot wall. If the soil stays wet days after the reservoir runs dry, drainage is blocked or the mix is too dense. Real-time data turns troubleshooting from guesswork into clear diagnosis.
Practical Sensor Maintenance, Calibration, and Cleaning
Out-of-the-box accuracy varies, and calibrating a sensor to your specific potting mix tightens the margin of error. The simplest two-point calibration uses a dry baseline and a saturated baseline. Fill a container with your usual potting mix, let it dry completely for several days, insert the probe, and record the “dry” reading. Then saturate the same mix with water until it won’t take any more, let it drain for 30 minutes, insert the probe, and record the “wet” reading. Those two points define the full range for that medium. If your dry reading is 8 percent VWC and your wet reading is 82 percent, you now know that 50 percent VWC falls right in the middle of your working range, and you can adjust watering targets from there.
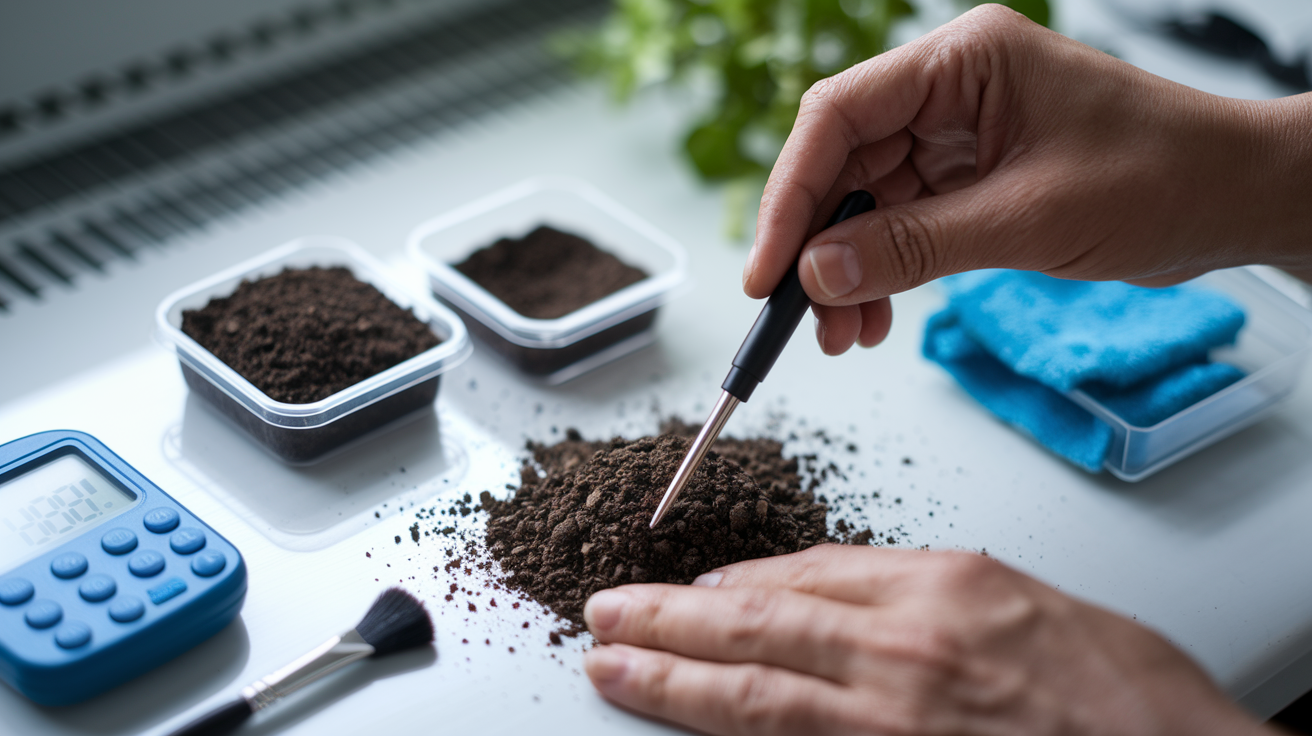
Resistive sensors corrode faster than capacitive models because the metal probes react with soil moisture, fertilizer salts, and organic acids. After each use, wipe the probes with a damp cloth to get rid of soil and mineral deposits, then dry them completely before you store them. Leaving a resistive probe in the soil long term speeds up corrosion and makes readings drift high as the metal surface breaks down. Capacitive sensors handle permanent insertion better, but even they benefit from occasional removal and cleaning. Rinse the probe under tap water, scrub gently with a soft brush if you see buildup, and dry before putting it back.
Replace cheap resistive meters every one to three years if you notice jumpy readings, a stuck needle, or a display that stops responding to wet versus dry soil. Capacitive units often last three to five years or longer with proper care. Most digital sensors run on AA, AAA, or coin-cell batteries. Replace them annually or whenever the display dims. Some analog meters need no batteries and last forever as long as the mechanical parts and probes stay intact.
Five-step calibration process:
- Prepare dry sample. Fill a small container with your potting mix and let it air dry completely for three to five days. Stir now and then to dry it evenly.
- Record dry baseline. Insert the probe to typical working depth, wait 30 seconds, and note the reading (like 8% VWC or 1 on a 1 to 10 scale).
- Saturate sample. Slowly add water to the dry mix until it won’t absorb more. Let excess drain for 30 minutes.
- Record wet baseline. Insert the probe, wait 30 seconds, and note the saturated reading (like 82% VWC or 10 on scale).
- Map your range. Use the two baselines to read intermediate numbers (like 45% VWC is roughly midpoint, good for most tropicals).
Clean probes after heavy fertilizer use or whenever you see white crust or green algae. Fertilizer salts mess with resistive sensors by boosting conductivity and creating falsely high moisture readings. Rinsing and drying the probes brings accuracy back. Store sensors in a dry spot between uses to stop corrosion and stretch working life.
Troubleshooting Sensor Readings in Container Gardens
When a sensor spits out inconsistent or weird readings, first check placement. A probe shoved against the pot wall, inserted at a shallow angle that only samples the top inch, or forced through a dense root mass without reaching the bulk soil will give you junk numbers. Re-insert at the correct two-thirds depth, aim for the pot center or midway zone, and rotate the probe gently if the soil is packed.
Fertilizer salts build up over time in container soil, especially with synthetic liquid feeds, and they throw off resistive sensors by ramping up electrical conductivity. If your meter suddenly reads way wetter than it should (like 8 or 9 on the scale even though the pot feels light and the plant is wilting), salt buildup is probably the cause. Flush the pot with plain water (two to three times the pot volume, poured slowly) to wash out excess salts, let it drain fully, wait an hour, then test again. For capacitive sensors, salt has less impact, but extreme buildup can still nudge readings a bit.
Six-step troubleshooting checklist:
- Check probe depth. Confirm insertion reaches two-thirds pot depth and isn’t stopped by the drainage layer or pot bottom.
- Stay off the pot wall. Re-insert at least half an inch away from the edge to dodge boundary effects.
- Take multiple readings. Test two or three spots and average. Wide variation means uneven moisture, compaction, or layering.
- Inspect drainage. If readings stay high days after watering, check drainage holes for blockages, root mats, or saucer overflow. Standing water in the saucer keeps the bottom layer soaked.
- Clean the probe. Wipe off soil, rinse if needed, dry, and test again. Buildup on the sensor surface messes with accurate measurement.
- Compare with manual checks. Lift the pot to feel weight, press the soil surface, and look at plant symptoms (wilting, leaf curl). If sensor and observation don’t match, recalibrate or replace the sensor.
Stubborn high readings despite good drainage often point to potting mix problems. Peat-heavy mixes can become hydrophobic when dry, then hold water in pockets once rewetted, or a dense, poorly structured mix may lack air pores and stay waterlogged. Take readings at multiple depths (top third, middle, and lower third) to see whether moisture is layered. If the top reads 3 and the bottom reads 9, water is pooling at the base, a sign to repot into a chunkier, faster-draining medium.
Erratic sensor behavior (wildly different readings from one second to the next in the same spot) usually means a dying battery, corroded probe, or a failing internal part. Replace the battery first, clean the probe thoroughly, and if the problem continues, replace the sensor.
How Moisture Sensors Improve Water Efficiency and Reduce Waste

Precision watering gets rid of the most common waste: watering on a fixed schedule no matter what the plant actually needs. A sensor-based approach means you only add water when the reading drops into the trigger zone for that species (4 for a monstera, 2 for a jade plant), so every watering event is backed by real demand. For many common houseplants, this shift stretches watering intervals by three to seven days compared with a rigid weekly schedule, cutting total water use by 30 to 50 percent over a growing season without stressing the plant.
Real-time data also stops the overwatering-correction cycle that wastes water and messes up plant health. Without a sensor, it’s easy to water lightly every few days “just in case,” which keeps the top layer damp but never really soaks the root zone. The plant shows stress, so you water more, and the cycle goes on. A sensor shows you the moisture profile at depth, letting you water deeply when needed and skip the in-between top-ups that do nothing but boost evaporation and runoff.
Environmental and resource benefits:
- Less municipal or well water used. Fewer watering events mean measurable savings, especially across big collections.
- Lower runoff and saucer waste. Watering only when soil is dry cuts leaching and the need to dump excess from saucers.
- Less fertilizer lost. Watering less often means nutrients stay in the root zone longer instead of washing out the bottom.
- Better support for sustainable practices. Sensors pair naturally with rainwater harvesting, greywater reuse, and slow-release organic fertilizers that depend on steady, tuned moisture.
Steady moisture also cuts plant stress, which means stronger disease resistance, fewer pest problems, and less need for chemical fixes. A well-watered root system supports vigorous top growth, better leaf color, and more reliable flowering, so you get better results from the same inputs (light, fertilizer, pot space) without adding more resources.
Final Words
In the action, you saw how moisture sensors cut the guesswork, stop overwatering and underwatering, and give real-time soil readings that keep roots healthier. We touched on how they work, choosing the right probe, where to place it, and simple upkeep.
Put sensors to work by reading deeper than your finger and letting numbers guide watering. That’s exactly how soil moisture sensors help potted plants—by shifting to watering on demand and reducing root problems.
Try one on a needy plant first. Small wins, steadier growth, less stress.
FAQ
Q: What are the benefits of soil moisture sensors?
A: The benefits of soil moisture sensors are real-time soil readings that reduce overwatering and underwatering, protect roots from rot, save water, and shift watering from a schedule to plant-driven care for healthier potted plants.
Q: Do soil moisture meters really work?
A: Soil moisture meters really work when you use the right type and placement; capacitive probes are more accurate and durable, and readings are reliable if you insert the probe into the root zone and average a couple measurements.
Q: How to use a moisture meter for potted plants?
A: To use a moisture meter for potted plants, insert the probe two-thirds down avoiding the pot wall, wait 15-30 minutes after watering, take 2–3 readings and average them, then water only when below your plant’s threshold.
Q: How long can you leave a moisture meter in soil?
A: You can leave a moisture meter in soil briefly for readings, but remove resistive probes after use to prevent corrosion; capacitive or smart sensors made for monitoring can stay installed long-term.